OIL PAN INSTALLATION
PROCEDURE
-
INSTALL OIL CLEANER (CVT) MAGNET
-

*1 Oil Cleaner (CVT) Magnet Install the 2 oil cleaner (CVT) magnets to the transaxle oil (CVT) pan sub-assembly.
-
-
INSTALL TRANSAXLE OIL (CVT) PAN SUB-ASSEMBLY
-
Coat a new O-ring with ATF and install it to the oil strainer assembly.
Note
Ensure that the O-ring is not twisted or pinched.
-
Install the oil strainer assembly to the valve body assembly with the 2 bolts.
- Torque:
- 10.8 N*m { 110 kgf*cm, 8 ft.*lbf }
-
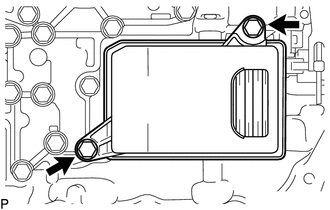
Clean the transaxle oil (CVT) pan sub-assembly installation surface of the continuously variable transaxle assembly.
-
Install a new transaxle oil pan (CVT) gasket to the transaxle oil (CVT) pan sub-assembly.
-
Install the transaxle oil (CVT) pan sub-assembly to the continuously variable transaxle assembly with the 19 bolts.
- Torque:
- 7.5 N*m { 76 kgf*cm, 66 in.*lbf }
-
Using a 6 mm hexagon socket wrench, install the No. 1 transmission oil filler tube to the transaxle oil (CVT) pan sub-assembly.
- Torque:
- 1.7 N*m { 17 kgf*cm, 15 in.*lbf }
-
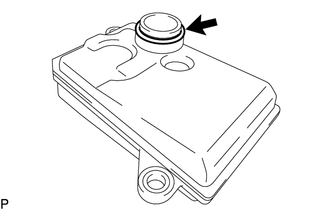
Using a 6 mm hexagon socket wrench, temporarily install the gasket and overflow plug to the transaxle oil (CVT) pan sub-assembly.
Tech Tips
Reuse the old gasket as the overflow plug will be removed again to adjust the fluid level.
-
Using a 10 mm hexagon socket wrench, install a new gasket and drain plug to the transaxle oil (CVT) pan sub-assembly.
- Torque:
- 49 N*m { 500 kgf*cm, 36 ft.*lbf }
-
-
ADD CONTINUOUSLY VARIABLE TRANSAXLE FLUID
-
INSPECT FOR FLUID LEAK
-
INSTALL REAR ENGINE UNDER COVER LH
-
INSTALL NO. 1 ENGINE UNDER COVER ASSEMBLY