HEADLIGHT ASSEMBLY(for LED Headlight) DISASSEMBLY
CAUTION / NOTICE / HINT
Tech Tips
-
Use the same procedure for the RH and LH sides.
-
The procedure listed below is for the LH side.
PROCEDURE
-
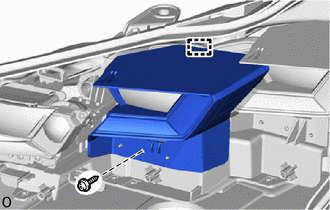
REMOVE HEADLIGHT LIGHT CONTROL ECU SUB-ASSEMBLY LH
-
REMOVE HEADLIGHT GASKET
-
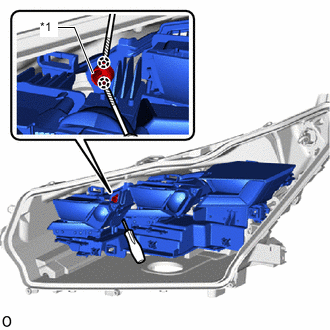
REMOVE HEADLIGHT LEVELING MOTOR LH
-
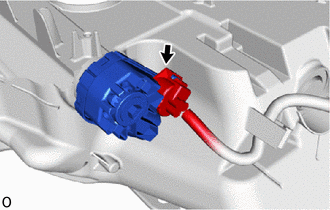
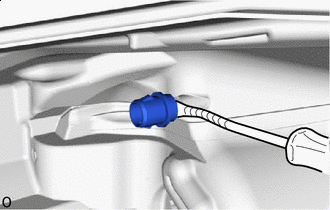
Disconnect the connector.
-
*1 Aiming Screw Loosen the aiming screw 20 rotations.
-
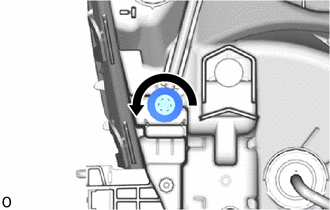
Turn the headlight leveling motor LH clockwise and remove it.
Note
-
Do not pull excessively as the headlight unit assembly LH and headlight leveling motor LH are connected at this time.
-
Turn while holding with one hand as the headlight leveling motor LH may jump out.
-
If the headlight leveling motor LH is removed, make sure to replace the headlight leveling motor base packing with a new one.
Tech Tips
For the headlight assembly RH, turn the headlight leveling motor RH counterclockwise to remove it.
-
-
Loosen the aiming screw of the headlight leveling motor LH until the headlight unit assembly LH is disconnected.
Tech Tips
Count and record the number of rotations before the headlight unit assembly LH and headlight leveling motor LH are disconnected.
-
-
REMOVE HEADLIGHT LEVELING MOTOR BASE PACKING
-
Remove the headlight leveling motor base packing.
Note
If the headlight leveling motor base packing is removed, replace it with a new one.
-
-
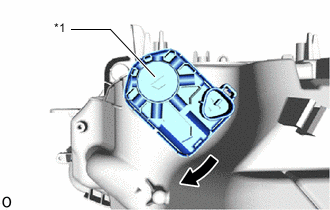
REMOVE HEADLIGHT LENS LH
-
Remove the 3 screws.
-
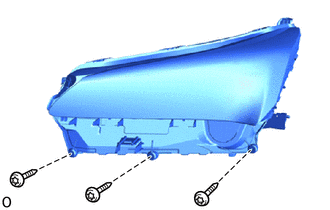
Using a T20H "TORX" screwdriver, remove the 3 screws.
-
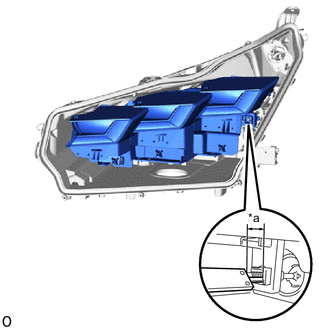
Detach the 7 claws.
Tech Tips
It is not necessary to detach the claw at the base point as the claw is detached in the later step.
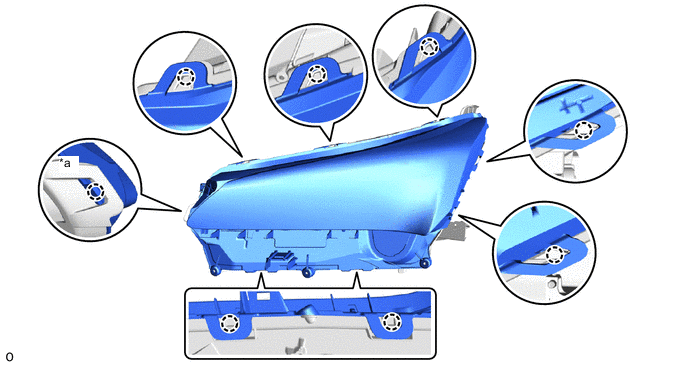
*a Base Point - - -
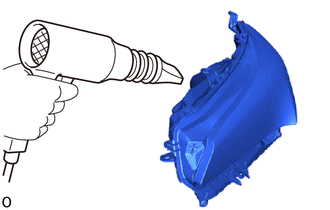
Using a dryer, heat the backside of the headlight assembly LH.
Note
If the headlight assembly LH is heated unevenly, it will deform or melt.
Tech Tips
The headlight lens gasket expands when warmed, pushing up the headlight lens LH and making the lens easy to remove.
-
Detach the claw at the base point to remove the headlight lens LH.
Note
-
Do not touch the headlight lens LH with bare hands.
-
If dirty, lightly wipe with a soft cloth.
Tech Tips
-
If the headlight lens LH cannot be removed even after heating, using a screwdriver, lift the headlight light lens LH.
-
Tape the screwdriver tip before use.
-
The headlight lens gasket may stick to the lens and become detached at the same time.
-
-
-
REMOVE HEADLIGHT LENS GASKET
-
Remove the headlight lens gasket.
-
-
REMOVE HEADLIGHT UNIT ASSEMBLY LH
Note
-
Perform work using rubber gloves.
-
Do not touch the headlight unit assembly LH and other components removed during this procedure with bare hands.
-
If dirty, lightly wipe with a soft cloth.
-
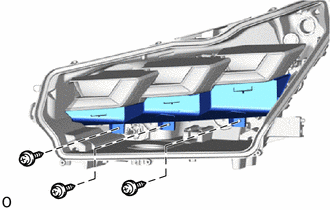
Remove the 3 screws and cover.
-
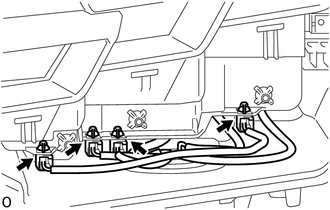
Disconnect the 4 connectors.
-
*a Protrusion Amount Measurement Area Using a vernier caliper, measure and record the protrusion amount of the aiming screw.
-
Loosen the horizontal aiming screw 20 rotations.
-
Remove the inner lens cover:
-
Remove the screw.
-
Detach the guide and remove the inner lens cover.
-
-
Remove the center lens cover:
-
Remove the screw.
-
Detach the guide and remove the center lens cover.
-
-
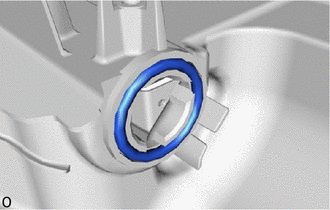
*1 Pivot Collar 
Protective Tape Using a screwdriver, detach the 2 claws and disconnect the headlight unit assembly LH from the pivot collar.
Tech Tips
Tape the screwdriver tip before use.
-
While holding the headlight unit assembly LH with one hand so that it does not fall over, loosen the horizontal aiming screw until the headlight unit assembly LH is disconnected.
-
Protective Tape Using a clip remover, remove the pivot collar and attach the 2 claws to install it to the headlight unit assembly LH.
Tech Tips
Tape the clip remover tip before use.
-
-
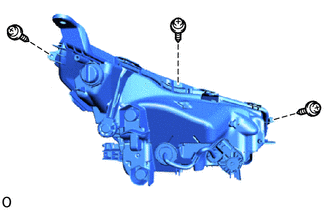
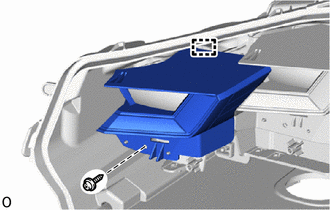
REMOVE HEADLIGHT FAN LH
-
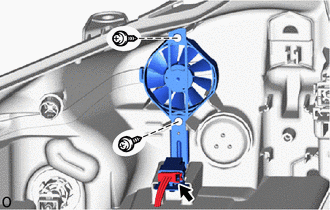
Disconnect the connector.
-
Remove the 2 screws and headlight fan LH.
-