STARTER REMOVAL
PROCEDURE
PRECAUTION
Note:After turning the ignition switch off, waiting time may be required before disconnecting the cable from the negative (-) battery terminal. Therefore, make sure to read the disconnecting the cable from the negative (-) battery terminal notices before proceeding with work.
DISCONNECT CABLE FROM NEGATIVE BATTERY TERMINAL
Note:When disconnecting the cable, some systems need to be initialized after the cable is reconnected.
REMOVE AIR CLEANER CASE SUB-ASSEMBLY
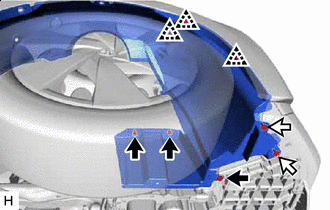
DISCONNECT FRONT FENDER LINER RH
-

Bolt

Screw
Using a clip remover, remove the 3 clips.
Remove the 2 screws and 3 bolts to disconnect the front fender liner RH.
-
REMOVE STARTER ASSEMBLY
-
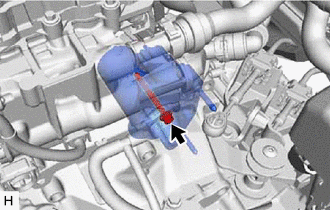
Using a 6 mm hexagon wrench, remove the bolt.
-
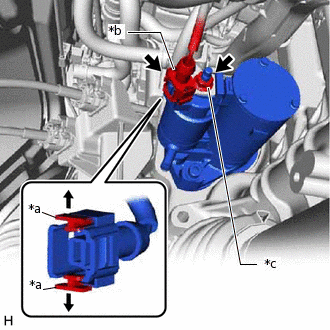
*a
Tab
*b
Starter Assembly Connector
*c
Nut
Pull out the tabs as shown in the illustration and disconnect the starter assembly connector.
Note:To prevent damage to the connector, do not pull out the tabs excessively.
Remove the nut and disconnect terminal 30.
-
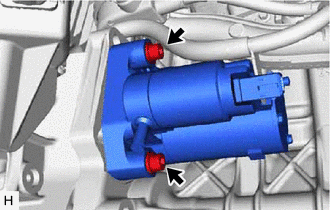
Using a 6 mm hexagon wrench, remove the 2 bolts and starter assembly.
-
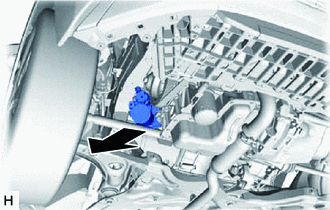
Remove the starter assembly as shown in the illustration.
-