ROOM LIGHT REMOVAL
PROCEDURE
-
REMOVE NO. 1 ROOM LIGHT ASSEMBLY (for Double Cab, for Smart Cab)
-
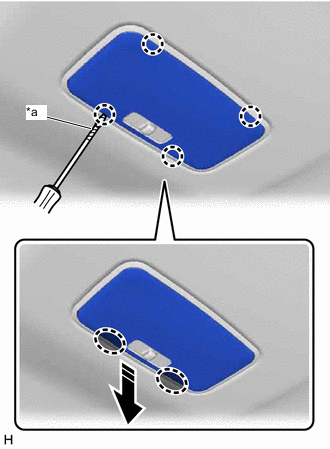
*a Protective Tape 
Insert Thin-bladed Screwdriver Here 
Remove in this Direction Insert a thin-bladed screwdriver at the position shown in the illustration, detach the claw and remove the No. 1 room light lens.
Tech Tips
Tape the thin-bladed screwdriver tip before use.
-
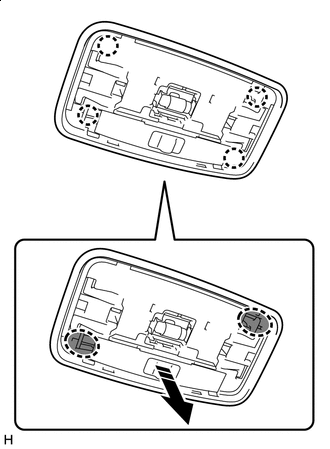
Place Finger Here Remove in this Direction Place your finger at the position shown in the illustration and pull as shown to detach the claw.
-
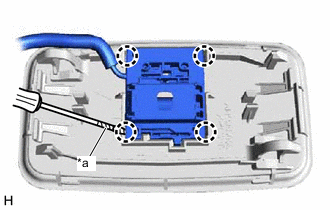
*a Protective Tape Using a screwdriver, detach the claw and remove the No. 1 room light assembly from the No. 1 room light switch base.
Tech Tips
Tape the screwdriver tip before use.
-
-
REMOVE MAP LIGHT ASSEMBLY (ROOM LIGHT) (for Single Cab)
-
*a Protective Tape Insert Thin-bladed Screwdriver Here Remove in this Direction Insert a thin-bladed screwdriver at the position shown in the illustration, detach the claw and remove the map light lens.
Tech Tips
Tape the thin-bladed screwdriver tip before use.
-
Place Finger Here Remove in this Direction Place your finger at the position shown in the illustration and pull as shown to detach the claw.
-
*a Protective Tape Using a screwdriver, detach the claw and remove the map light assembly (room light) from the map light switch base.
Tech Tips
Tape the screwdriver tip before use.
-