RADIATOR REMOVAL
CAUTION / NOTICE / HINT
Tech Tips
-
Use the same procedure for RHD and LHD vehicles.
-
The procedure listed below is for LHD vehicles.
PROCEDURE
-
REMOVE V-BANK COVER SUB-ASSEMBLY
-
REMOVE UPPER RADIATOR SUPPORT SEAL
-
REMOVE RADIATOR COVER PLATE
-
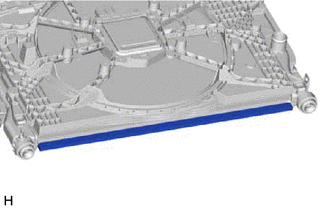
REMOVE LOWER RADIATOR AIR DEFLECTOR
-
REMOVE FRONT BUMPER
-
for Sport Package:
-
except Sport Package:
-
-
RECOVER REFRIGERANT FROM REFRIGERATION SYSTEM
-
for HFC-134a (R134a):
-
for HFO-1234yf (R1234yf):
-
-
REMOVE NO. 1 ENGINE UNDER COVER ASSEMBLY
-
REMOVE OIL PAN PROTECTOR
-
DRAIN ENGINE COOLANT
-
REMOVE RADIATOR SUPPORT TO CROSSMEMBER BRACE SUB-ASSEMBLY LH
-
REMOVE RADIATOR SUPPORT TO CROSSMEMBER BRACE SUB-ASSEMBLY RH
-
REMOVE NO. 1 AIR CLEANER INLET
-
REMOVE AIR CLEANER ASSEMBLY WITH AIR CLEANER HOSE
-
REMOVE LOWER ARM BRACKET BRACE SUB-ASSEMBLY LH
-
REMOVE LOWER ARM BRACKET BRACE SUB-ASSEMBLY RH
-
REMOVE HOOD LOCK RELEASE LEVER PROTECTOR
-
REMOVE HOOD LOCK ASSEMBLY
-
REMOVE HIGH PITCHED HORN ASSEMBLY
-
REMOVE LOW PITCHED HORN ASSEMBLY
-
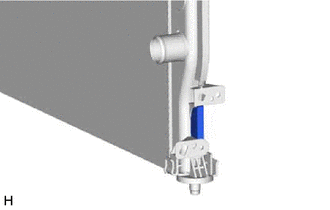
REMOVE RADIATOR RESERVE TANK ASSEMBLY
-
Slide the clip and disconnect the radiator reserve tank hose from the radiator reserve tank assembly.
-
*1 Radiator Pipe Slide the clip and disconnect the reserve tank outlet hose from the radiator pipe.
-

Disconnect the connectors and detach the clamps.
-
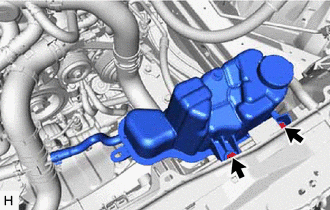
Remove the 2 bolts and radiator reserve tank assembly from the fan with motor assembly.
-
-
DISCONNECT NO. 1 OIL COOLER OUTLET HOSE (w/ In-tank Oil Cooler)
-
Detach the clamp.
-
Slide the clip and disconnect the No. 1 oil cooler outlet hose from the radiator assembly.
-
-
DISCONNECT NO. 3 TRANSMISSION OIL COOLER HOSE (w/ In-tank Oil Cooler)
-
Detach the clamp.
-
Slide the clip and disconnect the No. 3 transmission oil cooler hose from the radiator assembly.
-
-
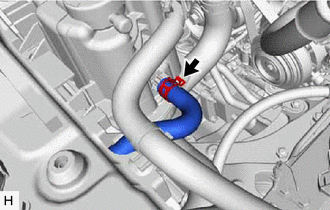
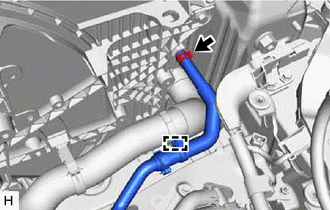
DISCONNECT NO. 1 OIL COOLER INLET HOSE
-
*1 Radiator Pipe Slide the clip and disconnect the No. 1 oil cooler inlet hose from the radiator pipe.
-
-
DISCONNECT NO. 1 RADIATOR HOSE
-
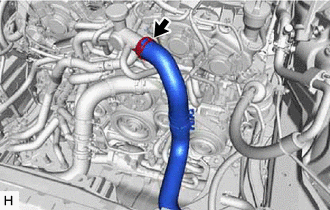
Slide the clip and disconnect the No. 1 radiator hose from the water outlet sub-assembly.
-
-
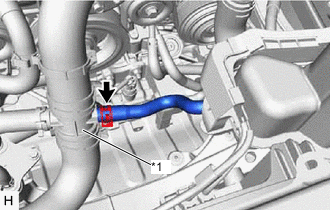
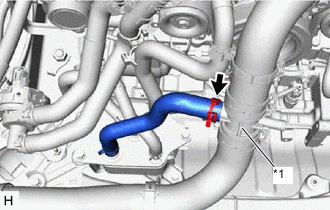
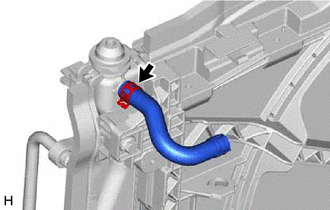
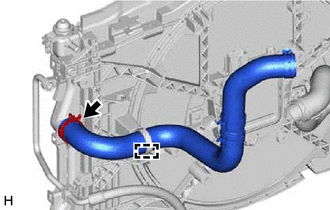
DISCONNECT NO. 3 RADIATOR HOSE
-
*1 No. 3 Radiator Hose Detach the clamps.
-
Slide the clip and disconnect the No. 3 radiator hose from the water inlet with thermostat sub-assembly.
-
-
DISCONNECT ENGINE ROOM MAIN WIRE
-
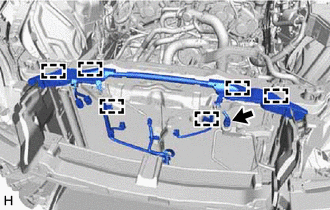
Disconnect the connector.
-
Detach the clamps and disconnect the engine room main wire.
-
-
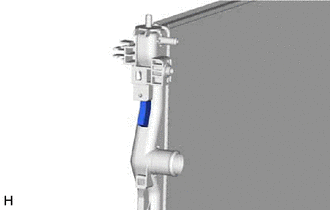
REMOVE HOOD LOCK CONTROL CABLE COVER LH (for LHD)
-
Remove the screw.
-
Detach the clamp and disconnect the hood lock control cover LH.
-
-
REMOVE HOOD LOCK CONTROL CABLE COVER RH
-
Remove the screw.
-
Detach the clamp and disconnect the hood lock control cover RH.
-
-
REMOVE UPPER RADIATOR SUPPORT SUB-ASSEMBLY
-
Remove the 5 bolts and upper radiator support sub-assembly.
Note
Do not allow the cooler condenser assembly to interfere with the radiator assembly.
-
-
DISCONNECT LIQUID TUBE SUB-ASSEMBLY A
-
DISCONNECT DISCHARGE HOSE SUB-ASSEMBLY
-
Compressor with Pulley Assembly Side:
-
Cooler Condenser Assembly Side:
-
-
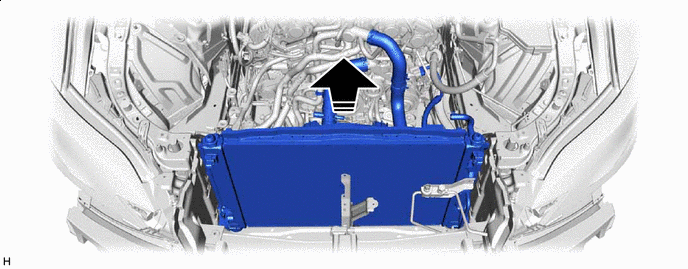
REMOVE COOLER CONDENSER ASSEMBLY
-
Detach the claw.
-
While lifting the cooler condenser assembly in the direction of the arrow shown in the illustration, detach the guide and remove the cooler condenser assembly.
Note
-
When removing the cooler condenser assembly, do not damage the cooler condenser assembly and radiator assembly.
-
Prepare a drain pan or cloth in case the coolant leaks.

Remove in this Direction - - -
-
-
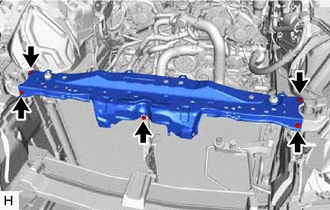
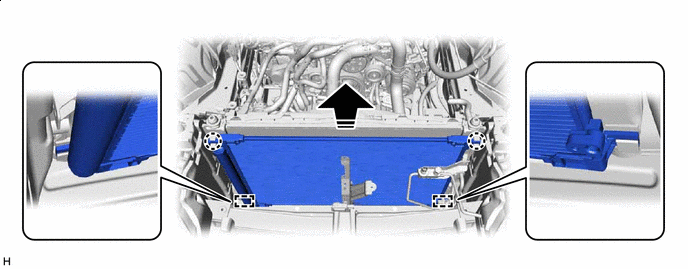
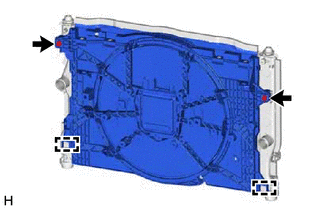
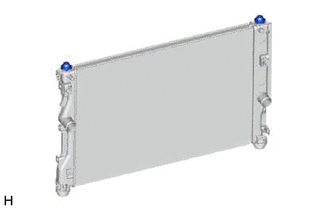
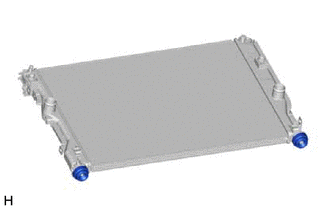
REMOVE RADIATOR ASSEMBLY
-
Remove the radiator assembly from the vehicle together with the fan with motor assembly as shown in the illustration.
Note
-
Perform the following procedure with 2 or more people to prevent damage to the radiator assembly.
-
When removing the radiator assembly from the vehicle, do not apply excessive force to the cooler pipe or cooling hoses.
-
Prepare a drain pan or cloth in case the coolant leaks.
Remove in this Direction - - -
-
-
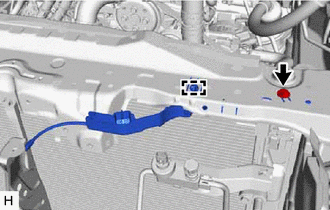
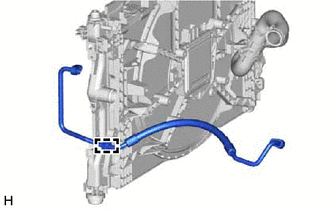
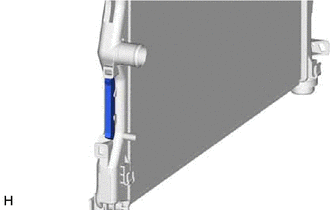
REMOVE RADIATOR RESERVE TANK HOSE
-
Slide the clip and remove the radiator reserve tank hose from the radiator assembly.
-
-
REMOVE REAR RADIATOR SIDE AIR GUIDE PLATE LH
-
Detach the claw and remove the rear radiator side air guide plate LH.
-
-
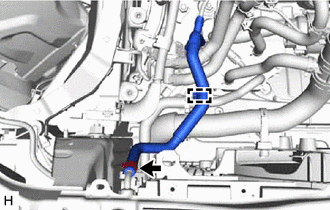
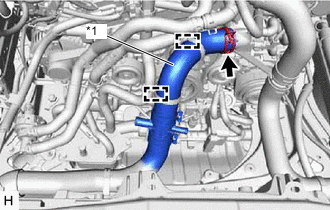
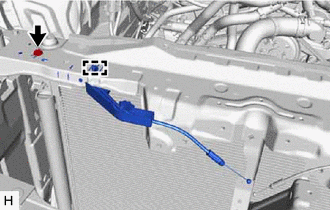
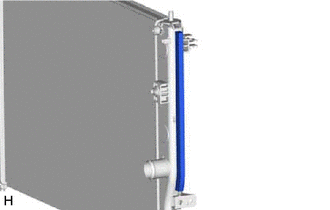
REMOVE NO. 1 RADIATOR HOSE
-
Detach the clamp.
-
Slide the clip and remove the No. 1 radiator hose from the radiator assembly.
-
-
REMOVE DISCHARGE HOSE SUB-ASSEMBLY
-
Detach the clamp and remove the discharge hose sub-assembly from the fan with motor assembly.
-
-
REMOVE REAR RADIATOR SIDE AIR GUIDE PLATE RH
-
Detach the claw and remove the rear radiator side air guide plate RH.
-
-
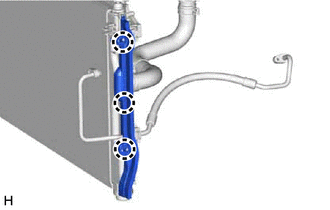
REMOVE NO. 2 RADIATOR HOSE
-
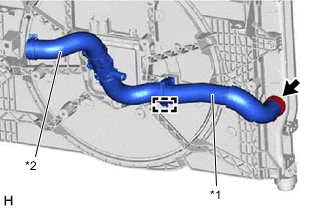
*1 No. 2 Radiator Hose *2 No. 3 Radiator Hose Detach the clamp.
-
Slide the clip and remove the No. 2 radiator hose with No. 3 radiator hose from the radiator assembly.
-
-
REMOVE FAN WITH MOTOR ASSEMBLY
-
Remove the 2 bolts.
-
Detach the 2 guides and remove the fan with motor assembly from the radiator assembly.
-
-
REMOVE SUB-RADIATOR SUPPORT CUSHION
-
Remove the 2 sub-radiator support cushions from the radiator assembly.
-
-
REMOVE LOWER RADIATOR SUPPORT
-
Remove the 2 lower radiator supports from the radiator assembly.
-
-
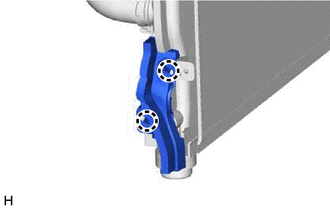
REMOVE NO. 1 RADIATOR TO SUPPORT SEAL
-
Upper Side:
-
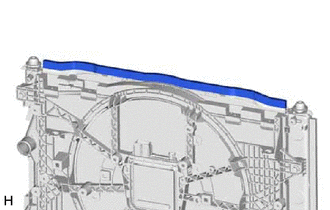
Remove the No. 1 radiator to support seal from the radiator assembly.
-
-
Lower Side:
-
Remove the No. 1 radiator to support seal from the radiator assembly.
-
-
-
REMOVE NO. 2 RADIATOR TO SUPPORT SEAL
-
Remove the No. 2 radiator to support seal from the radiator assembly.
-
-
REMOVE NO. 3 RADIATOR TO SUPPORT SEAL
-
Remove the No. 3 radiator to support seal from the radiator assembly.
-
-
REMOVE NO. 4 RADIATOR TO SUPPORT SEAL
-
Remove the No. 4 radiator to support seal from the radiator assembly.
-
-
REMOVE NO. 5 RADIATOR TO SUPPORT SEAL
-
Remove the No. 5 radiator to support seal from the radiator assembly.
-