CLUTCH MASTER CYLINDER(for LHD) REMOVAL
PROCEDURE
REMOVE INJECTOR DRIVER
REMOVE WINDSHIELD WIPER MOTOR ASSEMBLY
REMOVE OUTER COWL TOP PANEL SUB-ASSEMBLY
REMOVE AIR CLEANER SUPPORT
REMOVE COWL BODY MOUNTING REINFORCEMENT LH
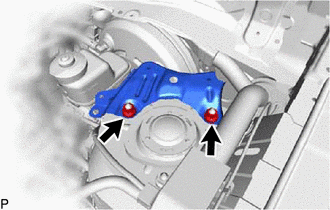
Remove the 2 nuts and mounting reinforcement.
REMOVE NO. 1 INSTRUMENT PANEL UNDER COVER SUB-ASSEMBLY (w/o Driver Side Knee Airbag)
REMOVE LOWER INSTRUMENT PANEL FINISH PANEL (w/o Driver Side Knee Airbag)
REMOVE LOWER NO. 1 INSTRUMENT PANEL AIRBAG ASSEMBLY (w/ Driver Side Knee Airbag)
DRAIN BRAKE FLUID
Note:Wash brake fluid off immediately if it adheres to any painted surface.
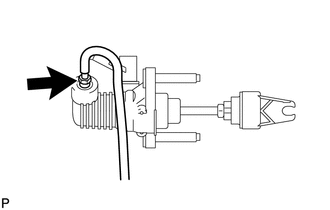
DISCONNECT CLUTCH RESERVOIR TUBE
Slide the clamp and disconnect the tube from the clutch master cylinder.
Tip:Use a container to catch the fluid.
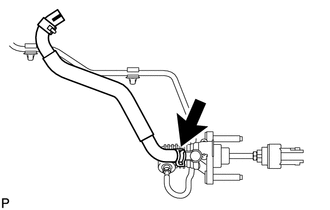
DISCONNECT CLUTCH MASTER CYLINDER TO FLEXIBLE HOSE TUBE
Using a union nut wrench, disconnect the clutch master cylinder to flexible hose tube.
Tip:Use a container to catch the fluid.
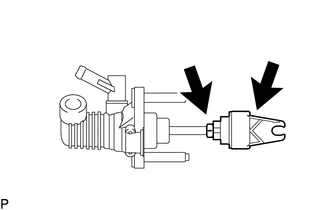
DISCONNECT CLUTCH MASTER CYLINDER PUSH ROD CLEVIS WITH HOLE PIN
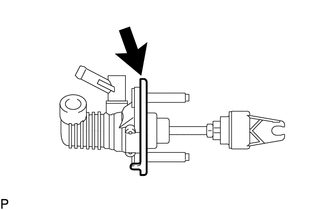
REMOVE CLUTCH MASTER CYLINDER ASSEMBLY
Remove the 2 nuts and clutch master cylinder assembly.
REMOVE CLUTCH MASTER CYLINDER BRACKET
Remove the clutch master cylinder bracket from the clutch master cylinder assembly.
REMOVE CLUTCH MASTER CYLINDER PUSH ROD CLEVIS
-
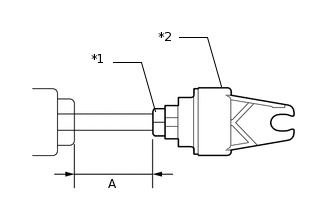
*1
Lock Nut
*2
Clutch Master Cylinder Push Rod Clevis
Measure dimension A as shown in the illustration before loosening the lock nut.
-
Loosen the lock nut and remove the clutch master cylinder push rod clevis.
Remove the lock nut.
-