CONTROL VALVE ASSEMBLY(for Rear Side) REMOVAL

CAUTION / NOTICE / HINT
Note
-
Be sure to read the "PRECAUTION" thoroughly before servicing.
-
In order to prevent the battery from becoming fully depleted, connect the battery charger to the battery when turning the engine switch on (IG) to charge the battery.
-
Keep the power supply connected to prevent the GTS battery from becoming fully depleted.
Tech Tips
Make sure to identification marks on the height control tube before removing them to prevent improper installation during reinstallation.
PROCEDURE
-
AIR SUSPENSION CONTROL PROHIBITED
-
REMOVE REAR WHEEL RH
-
REMOVE ROCKER PANEL MOULDING PROTECTOR RH
-
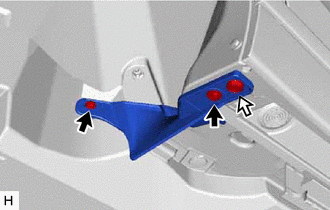
Remove the 2 screws, clip and rocker panel moulding protector RH.
-
-
REMOVE REAR WHEEL HOUSE LINER RH
-
Remove the 3 screws, 4 clips, 11 nuts, grommet and rear wheel house liner RH.
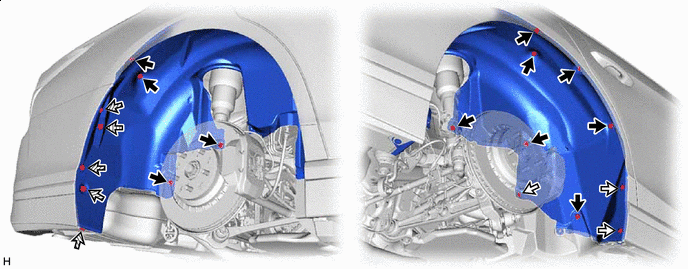

Nut 
Screw 
clip 
Grommet
-
-
INSTALL NO. 2 HEIGHT CONTROL VALVE SUB-ASSEMBLY
-
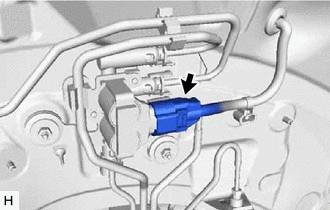
Disconnect the connector.
-
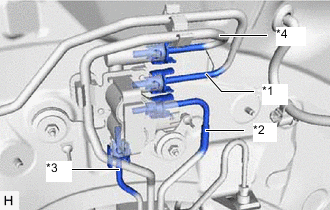
*1 No. 6 Height Control Tube *2 No. 7 Height Control Tube *3 No. 8 Height Control Tube *4 No. 9 Height Control Tube Using SST, disconnect the No. 6 height control tube.
- SST
- 09730-00020
-
Using SST, disconnect the No. 7 height control tube.
- SST
- 09730-00020
-
Using SST, disconnect the No. 8 height control tube.
- SST
- 09730-00020
-
Using SST, disconnect the No. 9 height control tube.
- SST
- 09730-00020
-
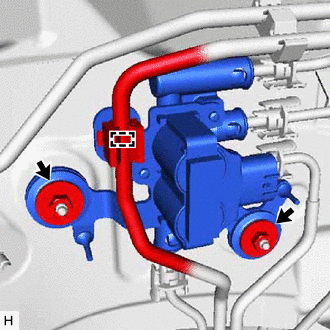
Detach the clamp and disconnect the No. 2 height control valve sub-assembly.
-
Remove the 2 nuts and No. 2 height control valve sub-assembly.
-
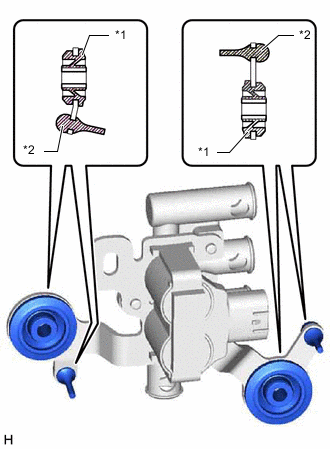
*1 No. 1 Height Control Valve Bush *2 No. 2 Height Control Valve Cushion Remove the 2 No. 1 height control valve bushes and No. 2 height control valve cushions from the No. 2 height control valve sub-assembly.
-