REAR PACKAGE TRAY SPEAKER REMOVAL
PROCEDURE
-
REMOVE REAR SEAT ASSEMBLY
-
REMOVE FRONT DOOR SCUFF PLATE LH
-
REMOVE FRONT DOOR SCUFF PLATE RH
Tech Tips
Use the same procedure as for the LH side.
-
REMOVE FRONT QUARTER TRIM PANEL ASSEMBLY LH
-
REMOVE INNER ROOF SIDE GARNISH ASSEMBLY LH
-
REMOVE FRONT QUARTER TRIM PANEL ASSEMBLY RH
Tech Tips
Use the same procedure as for the LH side.
-
REMOVE INNER ROOF SIDE GARNISH ASSEMBLY RH
Tech Tips
Use the same procedure as for the LH side.
-
REMOVE NO. 1 LUGGAGE COMPARTMENT TRIM COVER
-
REMOVE FRONT LUGGAGE COMPARTMENT TRIM COVER
-
REMOVE REAR SEAT SUB FLOOR PANEL
-
Disengage the 3 clips to remove the rear seat sub floor panel.
-
-
REMOVE NO. 2 ROOM PARTITION COVER
-
Remove the clip.
-
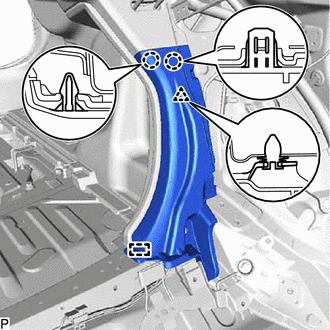
Disengage the 2 claws and clip.
-
Disengage the guide to remove the No. 2 room partition cover.
-
-
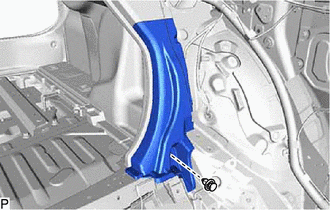
REMOVE NO. 1 ROOM PARTITION COVER
Tech Tips
Use the same procedure as for the No. 2 room partition cover.
-
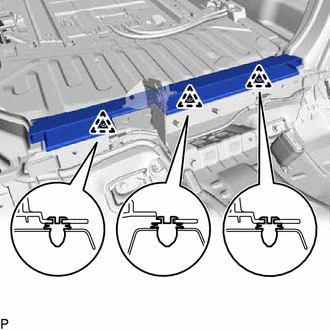
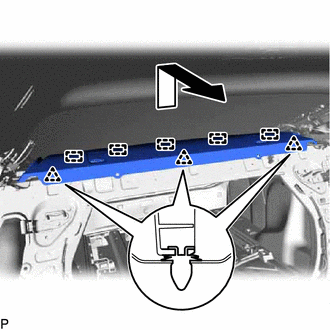
REMOVE NO. 3 ROOM PARTITION COVER
-
Disengage the 7 clips and remove the No. 3 room partition cover.
-
-
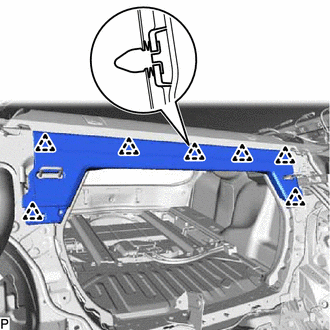
REMOVE PACKAGE TRAY TRIM PANEL ASSEMBLY
-
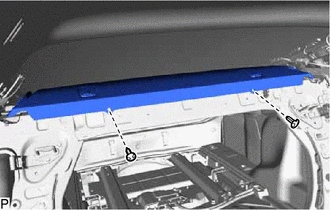
Using a clip remover, remove the 2 clips.
-
Disengage the 3 clips and 5 guides as shown in the illustration to remove the package tray trim panel assembly.
-
-
REMOVE REAR NO. 3 SPEAKER ASSEMBLY
-
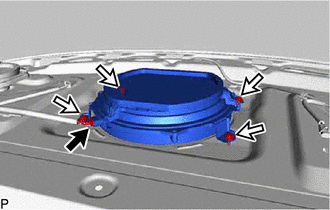
Disconnect the connector.
-
Remove the 4 bolts and rear No. 3 speaker assembly.
Note
Do not touch the speaker cone.
-
-
REMOVE REAR HEADER SPEAKER ASSEMBLY (for 17 Speakers)
Tech Tips
Use the same procedure for the RH side and LH side.
-
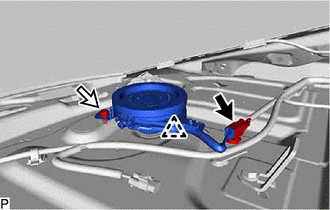
Disconnect the connector and remove the bolt.
-
Disengage the clip and remove the rear header speaker assembly.
Note
Do not touch the speaker cone.
-