TRANSMISSION CONTROL CABLE REMOVAL
PROCEDURE
REMOVE REAR CONSOLE BOX ASSEMBLY
REMOVE NO. 2 CYLINDER HEAD COVER
REMOVE AIR CLEANER CAP SUB-ASSEMBLY
REMOVE AIR CLEANER CASE SUB-ASSEMBLY
REMOVE BATTERY
REMOVE BATTERY CARRIER ASSEMBLY
REMOVE FRONT CENTER FLOOR BRACE SUB-ASSEMBLY
REMOVE FRONT EXHAUST PIPE ASSEMBLY (TWC: Front and Rear Catalyst)
REMOVE FRONT NO. 1 FLOOR HEAT INSULATOR
-
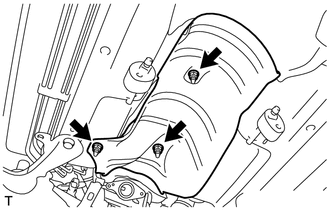
Remove the 3 nuts and front No. 1 floor heat insulator from the body.
-
REMOVE TRANSMISSION CONTROL CABLE ASSEMBLY
Move the shift lever to N.
-
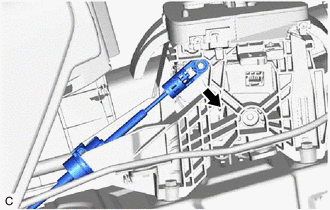
Disconnect the end of the transmission control cable assembly from the shift lever assembly.
-
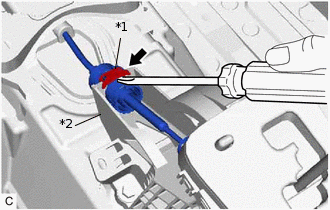
*1
Stopper
*2
Shift Lever Assembly
Using a screwdriver, pull out the stopper of the transmission control cable assembly.
Note:Do not remove the stopper. If it is removed, reinstall it to its original position.
-
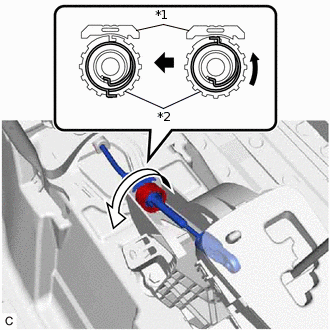
*1
Stopper
*2
Nut
Rotate the nut counterclockwise approximately 180° and, while holding the nut in that position, disconnect the transmission control cable assembly from the shift lever assembly.
Note:Do not rotate the nut excessively as the interior spring may come off and the transmission control cable assembly will not be reusable.
-
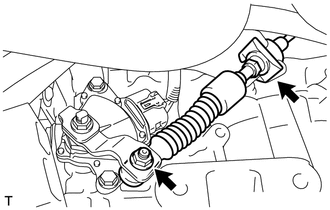
Remove the nut and disconnect the transmission control cable assembly from the control shaft lever.
Remove the clip and separate the transmission control cable assembly from the No. 1 transmission control cable bracket.
-
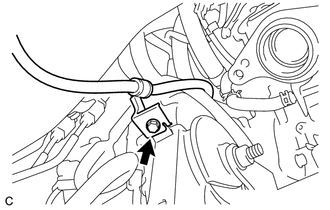
Remove the bolt and disconnect the transmission control cable assembly from the rear engine mounting insulator.
-
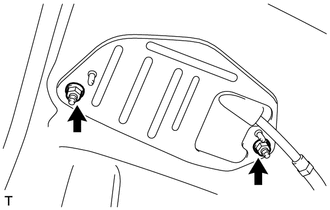
Remove the 2 nuts and then remove the transmission control cable assembly from the vehicle exterior.