HEADLIGHT ASSEMBLY(for HID Headlight) REASSEMBLY
CAUTION / NOTICE / HINT
Use the same procedure for the RH and LH sides.
The procedure listed below is for the LH side.
PROCEDURE
INSTALL CLEARANCE LIGHT BULB (w/o Daytime Running Light)
-
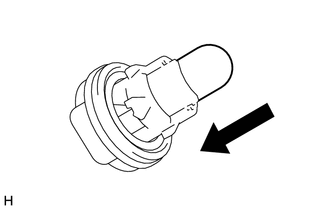
Install the clearance light bulb to the clearance light socket.
-
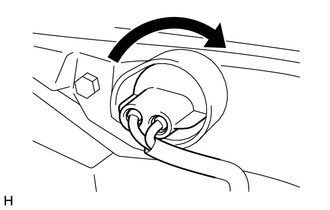
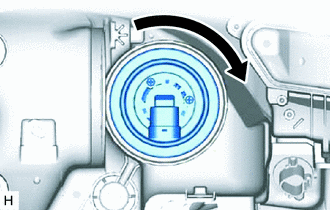
Turn the clearance light socket with the clearance light bulb in the direction indicated by the arrow to connect them as a unit.
-
INSTALL FRONT TURN SIGNAL LIGHT BULB
-
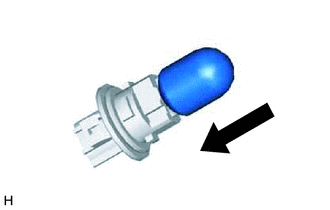
Install the front turn signal light bulb to the front turn signal light socket.
-
INSTALL FRONT TURN SIGNAL LIGHT SOCKET
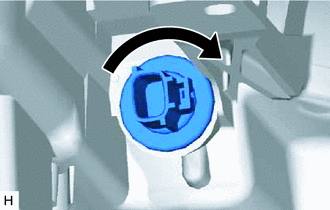
Turn the front turn signal light socket with the front turn signal light bulb in the direction indicated by the arrow to install them as a unit.
INSTALL NO. 2 HEADLIGHT BULB
-
Turn the No. 2 headlight bulb in the direction indicated by the arrow to install it.
Note:Do not touch the glass part of the bulb.
-
INSTALL DISCHARGE HEADLIGHT BULB
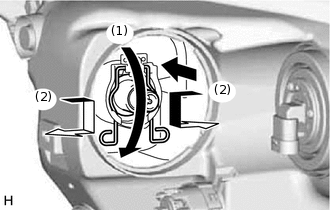
Set the discharge headlight bulb to the headlight unit.
Lock the set spring in the order shown in the illustration to install the discharge headlight bulb to the headlight unit.
Note:Do not touch the discharge headlight bulb glass.
INSTALL HEADLIGHT GASKET
Install a new headlight gasket to the headlight light control ECU sub-assembly.
INSTALL HEADLIGHT LIGHT CONTROL ECU SUB-ASSEMBLY
-
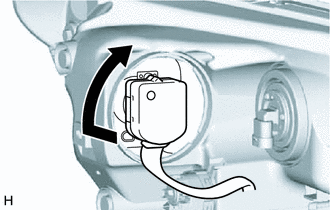
Turn the headlight light control ECU sub-assembly socket in the direction indicated by the arrow in the illustration to connect the headlight light control ECU sub-assembly socket.
Note:Check that the headlight gasket is installed on the headlight light control ECU sub-assembly.
Check that the headlight gasket is not damaged or contaminated with foreign matter. If there is any damage, replace the headlight gasket with a new one.
Do not pull the headlight light control ECU sub-assembly with the socket connected.
-
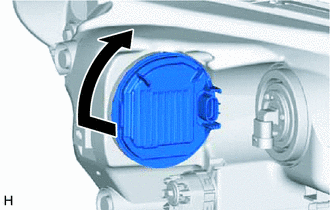
Turn the headlight light control ECU sub-assembly in the direction indicated by the arrow in the illustration to install the headlight light control ECU sub-assembly to the headlight unit.
-