STARTER (for 2.7 kW Type) INSTALLATION
-
INSTALL STARTER ASSEMBLY
-
for Automatic Transmission:
-
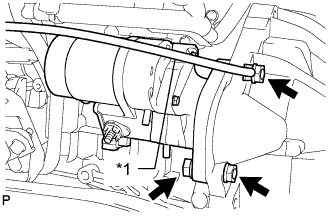
Text in Illustration *1 Ground Cable Connect the ground cable and install the starter assembly with the 2 nuts and bolt.
- Torque:
- 68 N*m { 693 kgf*cm, 50 ft.*lbf }
Tech Tips
Make sure to connect the ground cable with the nut as shown in the illustration.
-
-
for Manual Transmission:
-
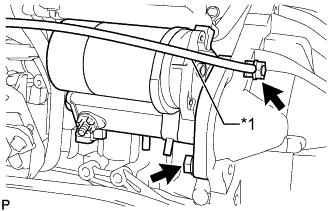
Text in Illustration *1 Ground Cable Connect the ground cable and install the starter assembly with the nut and bolt.
- Torque:
- 68 N*m { 693 kgf*cm, 50 ft.*lbf }
Tech Tips
Make sure to connect the ground cable with the nut as shown in the illustration.
-
-
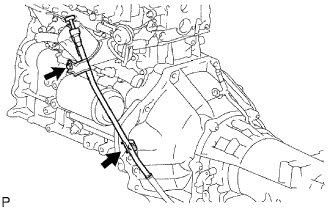
Install the starter wire to terminal 30 with the nut.
- Torque:
- 21 N*m { 214 kgf*cm, 15 ft.*lbf }
-
Connect the starter connector.
-
-
INSTALL TRANSMISSION OIL FILLER TUBE SUB-ASSEMBLY (for Automatic Transmission)
-
Coat a new O-ring with ATF, and install it to the oil filler tube.
-
Coat a new O-ring with ATF, and install it to the oil filler tube.
- Torque:
- 12 N*m { 122 kgf*cm, 9 ft.*lbf }
-
Install the oil level gauge.
-
-
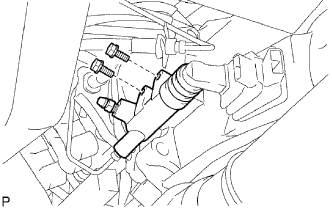
CONNECT CLUTCH RELEASE CYLINDER ASSEMBLY (for Manual Transmission)
-
Install the release cylinder with the 2 bolts.
- Torque:
- 12 N*m { 120 kgf*cm, 9 ft.*lbf }
-
-
INSTALL FRONT FENDER SEAL
-
Install the front fender seal with the 5 clips.
-
-
CONNECT CABLE TO NEGATIVE BATTERY TERMINAL
Note
When disconnecting the cable, some systems need to be initialized after the cable is reconnected Click here.