OUTPUT SHAFT REASSEMBLY
PROCEDURE
INSTALL OUTPUT SHAFT FRONT BEARING
-
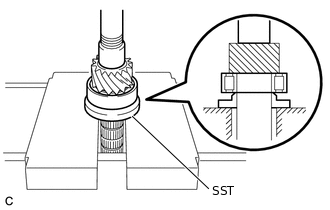
Using SST and a press, install a new output shaft front bearing to the output shaft.
09506-30012
-
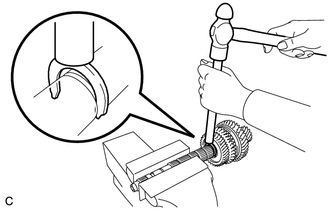
INSTALL NO. 1 1ST GEAR SHAFT SNAP RING
-
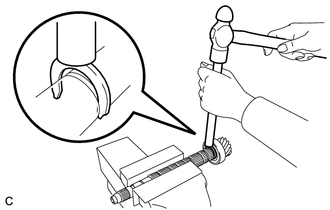
Hold the output shaft in a vise between aluminum plates.
Note:Do not overtighten the vise.
Using a brass bar and a hammer, install a new No. 1 1st gear shaft snap ring to the output shaft.
-
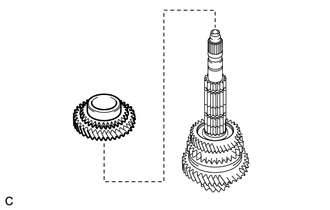
INSTALL 1ST GEAR
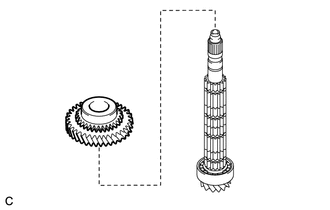
Install the 1st gear to the output shaft.
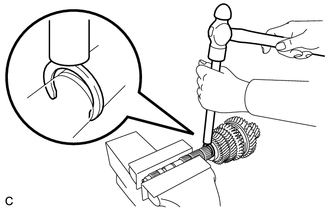
INSTALL No. 2 1ST GEAR SHAFT SNAP RING
-
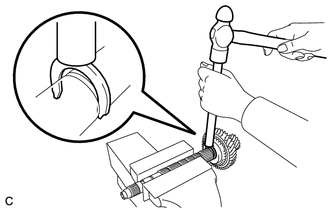
Using a brass bar and a hammer, install a new No. 2 1st gear shaft snap ring to the output shaft.
-
INSTALL NO. 1 TRANSMISSION CLUTCH HUB
Tip:Perform this procedure only when replacing the 3 synchromesh shifting key balls, 3 ball seats, 3 compression springs or 3 No. 1 synchromesh shifting keys.
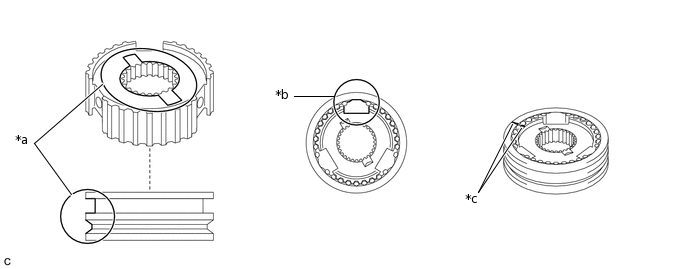
Align the No. 1 transmission clutch hub and No. 1 transmission hub sleeve as shown in the illustration and install them.
Note:When reusing the No. 1 transmission clutch hub and No. 1 transmission hub sleeve, make sure to align the matchmarks during installation.
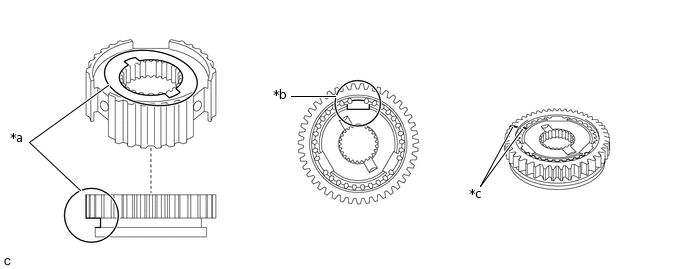
*a
Face the cutout of the No. 1 transmission clutch hub and gear of the No. 1 transmission hub sleeve upward.
*b
Align the grooves of the No. 1 transmission clutch hub and No. 1 transmission hub sleeve.
*c
Matchmark
-
-
Install the No. 1 synchromesh shifting key.
Tip:Install all 3 No. 1 synchromesh shifting keys.
-
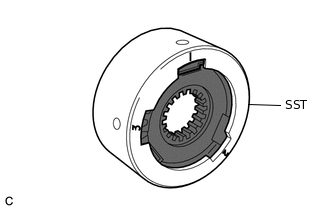
Align a cutout of the No. 1 transmission clutch hub with the cutout of SST marked 1, and install SST.
0317-MAZ
0317-AA
-
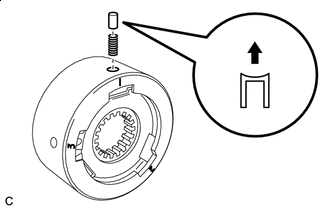

Up
Insert the compression spring and ball seat into the hole of SST.
-
Push in the ball seat with a screwdriver and install the No. 1 synchromesh shifting key to the No. 1 transmission clutch hub.
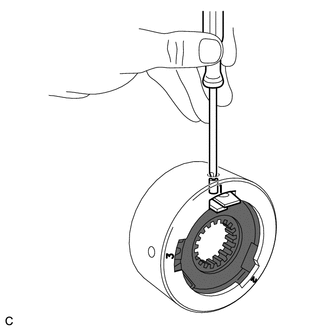
Insert the synchromesh shifting key ball into the hole of SST.
-
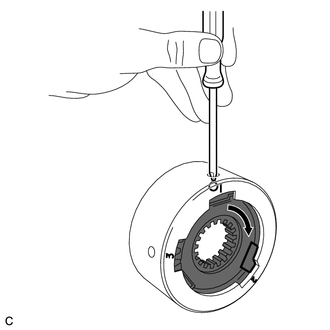
While pushing in the synchromesh shifting key ball with a screwdriver, rotate the No. 1 transmission clutch hub as shown in the illustration.
Note:Take care to prevent the synchromesh shifting key balls, ball seats and compression springs from scattering.
Install the 2 remaining No. 1 synchromesh shifting keys in the order of the cutout marked 2, then the cutout marked 3.
Tip:Install all 3 No. 1 synchromesh shifting keys.
-
Install the No. 1 transmission clutch hub.
-
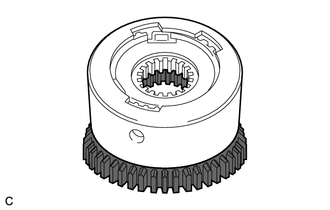
Face the gear side of the No. 1 transmission hub sleeve downward.
-
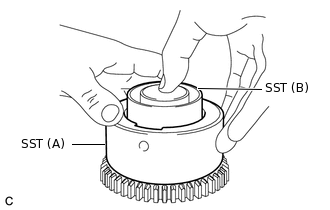
While holding SST (A), push SST (B) to install the No. 1 transmission clutch hub to the No. 1 transmission hub sleeve.
0317-MAZ
0317-AA
0317-T
-
INSTALL NO. 1 TRANSMISSION CLUTCH HUB WITH NO. 1 TRANSMISSION HUB SLEEVE
Install the 2 No. 1 synchronizer ring sets and No. 1 synchronizer hub assembly to the output shaft as shown in the illustration.
Note:Align the protrusions of the No. 1 synchronizer ring set with the cutouts of the No. 1 synchronizer hub assembly before installing the No. 1 synchronizer ring set.
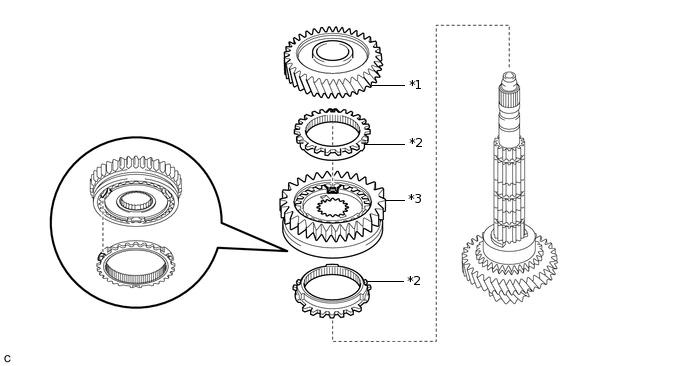
*1
2nd Gear
*2
No. 1 Synchronizer Ring Set
*3
No. 1 Synchronizer Hub Assembly
-
-
INSTALL 2ND GEAR
Install the 2nd gear to the output shaft.
INSTALL NO. 1 3RD REAR SHAFT SNAP RING
-
Using a brass bar and a hammer, install a new No. 1 3rd gear shaft snap ring to the output shaft.
-
INSTALL 3RD GEAR
Install the 3rd gear to the output shaft.
INSTALL NO. 2 3RD GEAR SHAFT SNAP RING
-
Using a brass bar and a hammer, install a new No. 2 3rd gear shaft snap ring to the output shaft.
-
INSTALL NO. 2 TRANSMISSION CLUTCH HUB
Tip:Perform this procedure only when replacing the 3 synchromesh shifting key balls, 3 compression springs or 3 No. 2 synchromesh shifting keys.
Apply gear oil to the No. 2 transmission clutch hub and No. 2 transmission hub sleeve.
Align the No. 2 transmission clutch hub and No. 2 transmission hub sleeve as shown in the illustration and install them.
Note:When reusing the No. 2 transmission clutch hub and No. 2 transmission hub sleeve, make sure to align the matchmarks during installation.
*a
Face the cutout of the No. 2 transmission clutch hub and groove of the No. 2 transmission hub sleeve upward.
*b
Align the grooves of the No. 2 transmission clutch hub and No. 2 transmission hub sleeve.
*c
Matchmark
-
-
Temporarily install the No. 2 transmission hub sleeve to the No. 2 transmission clutch hub.
Install the 3 No. 2 synchromesh shifting keys to the No. 2 transmission clutch hub.
Install the 3 compression springs to the No. 2 transmission clutch hub.
Place the 3 synchromesh shifting key balls into the holes of the No. 2 synchromesh shifting keys and install the No. 2 transmission hub sleeve to the No. 2 transmission clutch hub while pushing in the synchromesh shifting key balls.
Note:Take care to prevent the synchromesh shifting key balls and compression springs from scattering.
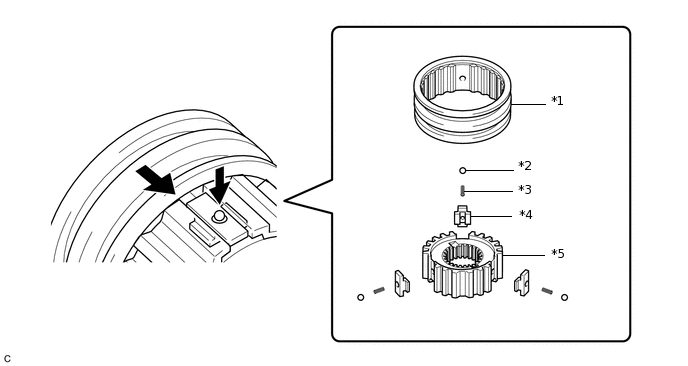
*1
No. 2 Transmission Hub Sleeve
*2
Synchromesh Shifting Key Ball
*3
Compression Spring
*4
Synchromesh Shifting Key
*5
No. 2 Transmission Clutch Hub
-
-
INSTALL NO. 2 TRANSMISSION CLUTCH HUB WITH NO. 2 TRANSMISSION HUB SLEEVE
Install the 2 No. 2 synchronizer ring sets and No. 2 transmission clutch hub with No. 2 transmission hub sleeve to the output shaft.
Tip:Align the protrusions of the No. 2 synchronizer ring set with the cutouts of the No. 2 synchronizer hub assembly before installing the No. 2 synchronizer ring set.
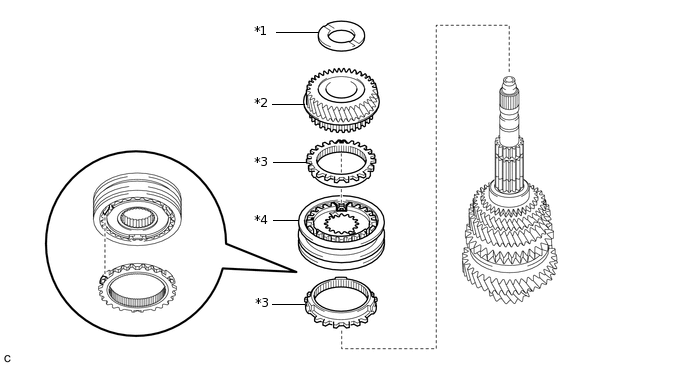
*1
Output Shaft Spacer
*2
4th Gear
*3
No. 2 Synchronizer Ring Set
*4
No. 2 Transmission Clutch Hub with No. 2 Transmission Hub Sleeve
INSTALL 4TH GEAR
Install the 4th gear to the output shaft.
INSTALL OUTPUT SHAFT SPACER
Install the output shaft spacer to the output shaft.
INSTALL OUTPUT SHAFT REAR BEARING
-
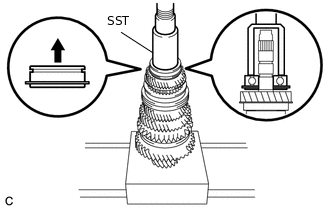

Up
Using SST and a press, install a new output shaft rear bearing to the output shaft.
09636-20010
Note:Install the output shaft rear bearing as shown in the illustration.
-
INSTALL OUTPUT SHAFT REAR BEARING HOLE SNAP RING
-
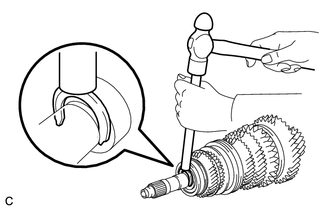
Using a brass bar and a hammer, install a new output shaft rear bearing hole snap ring to the output shaft.
-
INSTALL OUTPUT SHAFT END COVER
Using a plastic hammer, install a new output shaft end cover to the output shaft.