BACK DOOR OUTSIDE GARNISH REMOVAL
PROCEDURE
-
REMOVE BACK DOOR CENTER GARNISH
-
REMOVE BACK DOOR SIDE GARNISH LH
-
REMOVE BACK DOOR SIDE GARNISH RH
-
REMOVE BACK DOOR TRIM BOARD ASSEMBLY
-
REMOVE BACK DOOR OUTSIDE GARNISH SUB-ASSEMBLY
-
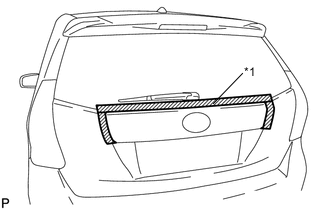
Text in Illustration *1 Protective Tape Put protective tape around the back door outside garnish sub-assembly.
-
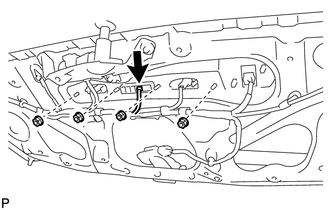
Disconnect the connector.
-
Remove the 4 nuts.
-
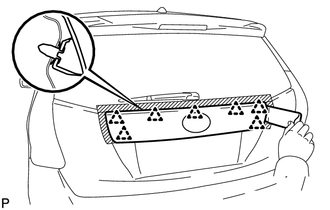
Using a moulding remover, disengage the 7 clips and remove the back door outside garnish sub-assembly.
-
Remove the 7 clips (back door outside garnish clip) from the back door outside garnish sub-assembly.
-
Remove the 4 gaskets from the back door outside garnish sub-assembly.
-
-
REMOVE BACK DOOR OPENER SWITCH ASSEMBLY
-
REMOVE NO. 1 BACK DOOR EMBLEM