WASHER MOTOR REMOVAL
PROCEDURE
REMOVE FRONT BUMPER COVER
REMOVE FRONT FENDER LINER RH
-
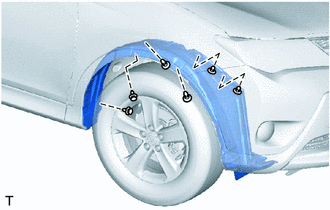
Using a screwdriver, remove the 6 clips.
Partially remove the front fender liner RH.
Tip:It is not necessary to fully remove the front fender liner RH. Partially remove it so that the front bumper assembly can be removed later.
-
DRAIN WASHER FLUID
-
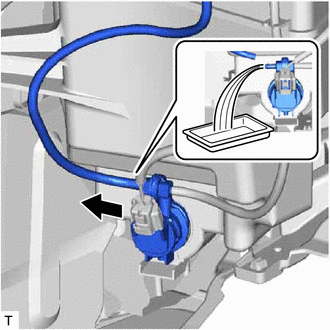
Disconnect the washer hose from the windshield washer motor and pump assembly, and drain the washer fluid.
Tip:Use a container to collect the washer fluid.
-
REMOVE WINDSHIELD WASHER MOTOR AND PUMP ASSEMBLY
-
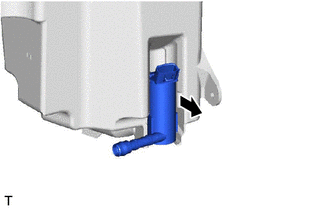
Disconnect the connector and hose.
Pull out the windshield washer motor and pump assembly from the packing of the windshield washer jar assembly.
-
REMOVE WASHER INLET SUB-ASSEMBLY
-
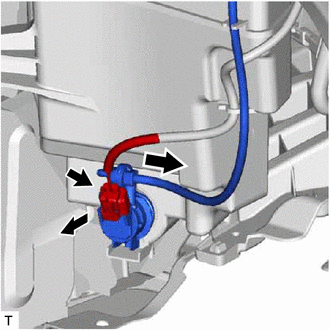
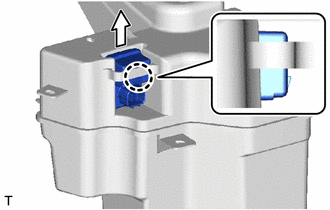
Remove the clip.
Pull the washer inlet sub-assembly upward to remove it from the windshield washer jar assembly.
-
REMOVE WINDSHIELD WASHER JAR ASSEMBLY
Disconnect the 3 connectors and detach the 6 clamps.
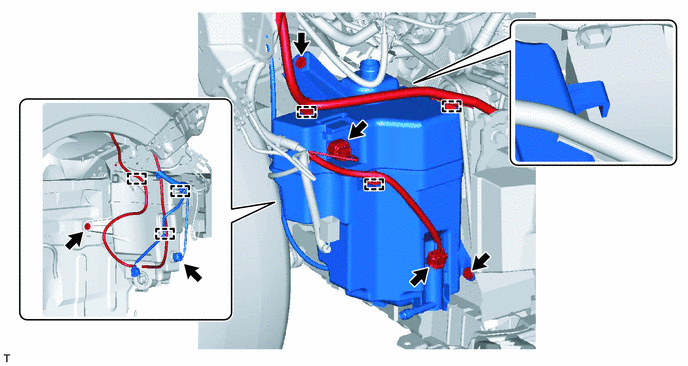
Remove the 3 bolts. Then detach guide A and remove the windshield washer jar and pump assembly.
REMOVE HEADLIGHT CLEANER MOTOR AND PUMP ASSEMBLY
Remove the headlight cleaner motor and pump assembly.
REMOVE HEADLIGHT CLEANER CONTROL RELAY
Detach the claw and remove the headlight cleaner control relay.
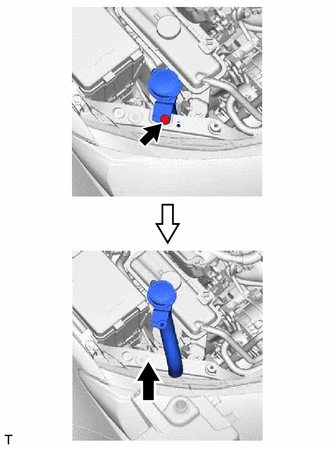
REMOVE LEVEL WARNING SWITCH ASSEMBLY
-
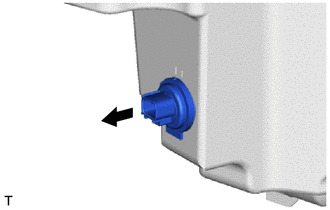
Pull out the level warning switch assembly in thedirection indicated by arrow in the illustration toremove it.
-