SLIDING ROOF HOUSING(for Panoramic Moon Roof) DISASSEMBLY
PROCEDURE
-
REMOVE NO. 1 SLIDING ROOF SIDE GARNISH LH
-
Using a heat light, heat the No. 1 sliding roof side garnish LH.
Heating Temperature Item Temperature No. 1 Sliding Roof Side Garnish LH 20 to 30°C (68 to 86°F) CAUTION:
-
Do not touch the heat light and heated parts, touching the heat light may result in burns.
-
Touching heated parts for a long time may result in burns.
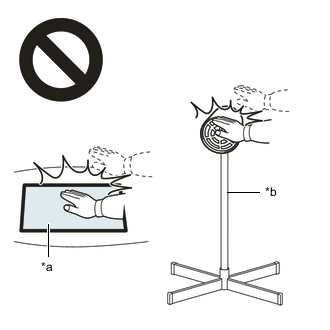
*a Heated Part *b Heat Light Note
Do not heat the No. 1 sliding roof side garnish LH excessively.
-
-
Disengage the 28 claws and 2 guides to remove the No. 1 sliding roof side garnish LH.
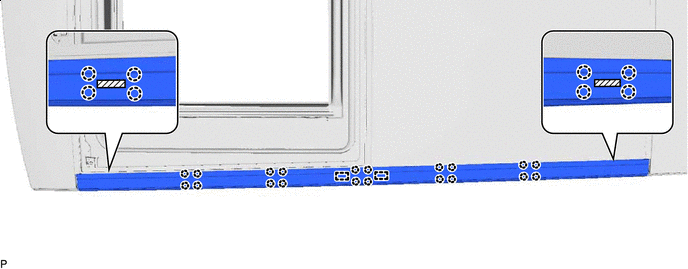

Double-sided Tape - -
-
-
REMOVE NO. 1 SLIDING ROOF SIDE GARNISH RH
Tech Tips
Use the same procedure as for the LH side.
-
REMOVE ROOF WIND DEFLECTOR PANEL SUB-ASSEMBLY
-
Disengage the 3 claws.

*a Pin (A) *b Pin (B) *c Protective Tape - - -
Disengage the 2 pins (A).
-
Using a screwdriver with its tip wrapped with protective tape, disengage the 2 pins (B) to remove the roof wind deflector panel sub-assembly.
-
-
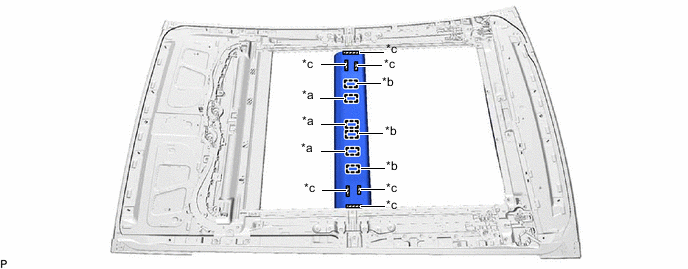
REMOVE NO. 2 ROOF WIRE
-
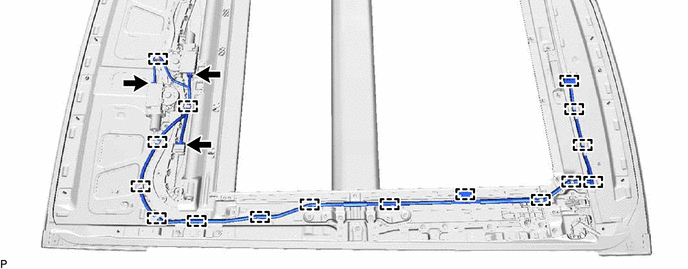
Disconnect the 3 connectors.
-
Disengage the 16 clamps to remove the No. 2 roof wire.
-
-
REMOVE SLIDING ROOF DRIVE GEAR ASSEMBLY (for Sliding Roof Glass)
-
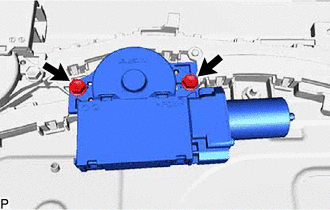
Remove the 2 bolts and sliding roof drive gear assembly.
-
-
REMOVE SLIDING ROOF DRIVE GEAR ASSEMBLY (for Roof Sunshade)
-
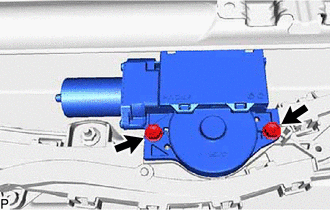
Remove the 2 bolts and sliding roof drive gear assembly.
-
-
REMOVE REAR SLIDING ROOF GARNISH
-
Using a heat light, heat the rear sliding roof garnish.
Heating Temperature Item Temperature Rear Sliding Roof Garnish 20 to 30°C (68 to 86°F) CAUTION:
-
Do not touch the heat light and heated parts, touching the heat light may result in burns.
-
Touching heated parts for a long time may result in burns.
*a Heated Part *b Heat Light Note
Do not heat the rear sliding roof garnish excessively.
-
-
Disengage the 3 fasteners and 3 guides to remove the rear sliding roof garnish.
*a Fastener *b Guide *c Double-sided Tape - -
-
-
REMOVE ROOM LIGHT BRACKET
-
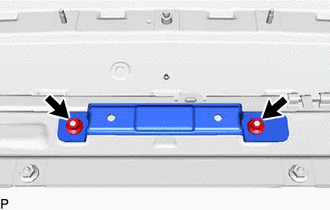
Remove the 2 nuts and room light bracket.
-
-
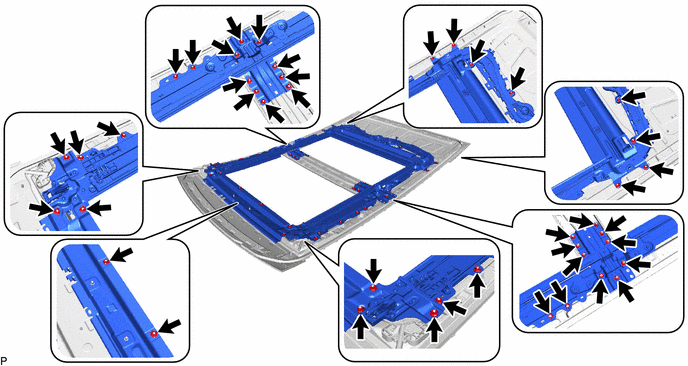
REMOVE SLIDE ROOF RAIL SUB-ASSEMBLY
-
Remove the 42 nuts and slide roof rail sub-assembly from the sliding roof housing panel.
-
-
REMOVE SUNSHADE TRIM SUB-ASSEMBLY
-
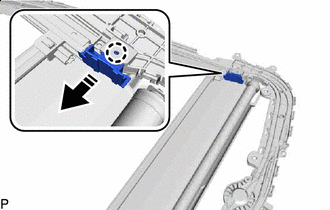

Remove in this Direction Disengage the claw to remove the sliding roof sunshade guide RH as shown in the illustration.
Tech Tips
Use the same procedure for the RH side and LH side.
-

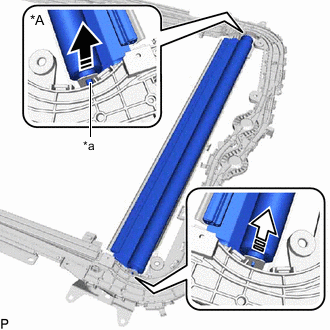
*a Portion A Remove in this Direction Move the portion (A) as shown in the illustration to disengage the claw.
Tech Tips
Use the same procedure for the RH side and LH side.
-
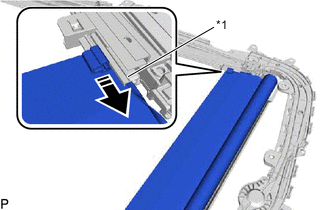
*1 Sliding Roof Guide Rail Sub-assembly RH Remove in this Direction Slide the sliding roof sunshade runner and sunshade trim sub-assembly as shown in the illustration to separate them from the sliding roof guide rail sub-assembly RH.
Tech Tips
Use the same procedure for the RH side and LH side.
-
*A RH Side *a Retractor Cap Remove in this Direction (1) 
Remove in this Direction (2) Remove the sunshade trim sub-assembly as shown in the illustration.
Note
To prevent the sunshade trim sub-assembly from being damaged, fully push in the RH side retractor cap before lifting the sunshade trim sub-assembly to separate it from the slide roof rail sub-assembly.
Tech Tips
Separate the RH side first.
-