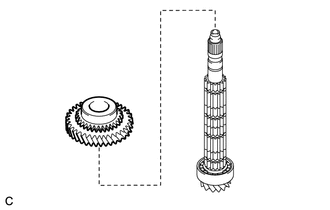
OUTPUT SHAFT DISASSEMBLY
PROCEDURE
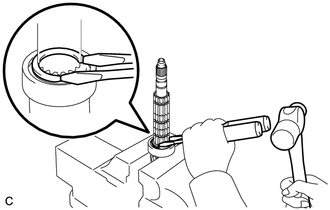
REMOVE OUTPUT SHAFT END COVER
Hold the output shaft in a vise between aluminum plates.
Note:Do not overtighten the vise.
-
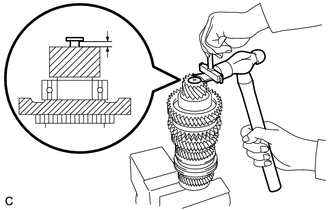
Using an oil pan seal cutter and a hammer, make a clearance between the output shaft end cover and output shaft as shown in the illustration.
-
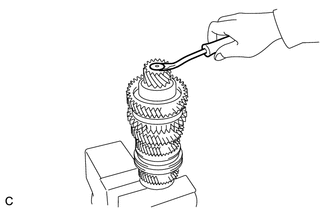
Using a clip remover, remove the output shaft end cover from the output shaft.
REMOVE OUTPUT SHAFT REAR BEARING HOLE SNAP RING
-
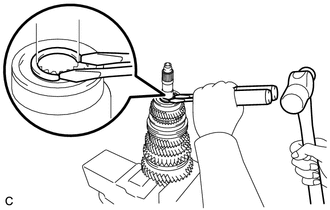
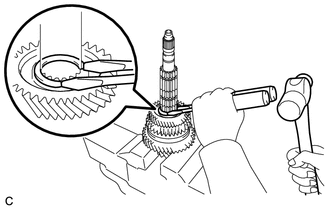
Using 2 screwdrivers and a hammer, remove the output shaft rear bearing hole snap ring from the output shaft.
Tip:Use a piece of cloth to prevent the output shaft rear bearing hole snap ring from flying off.
-
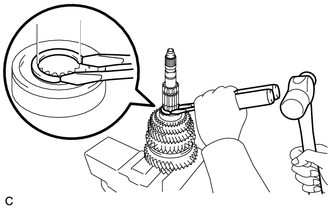
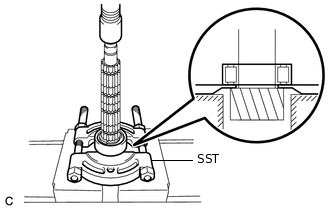
REMOVE OUTPUT SHAFT REAR BEARING
-
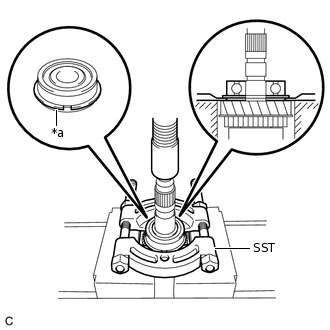
*a
Snap Ring
Using SST and a press, remove the output shaft rear bearing from the output shaft.
09950-00020
Note:Do not excessively tighten SST.
Support the output shaft by hand to prevent it from dropping.
Be careful not to deform the snap ring.
-
REMOVE OUTPUT SHAFT SPACER
Remove the output shaft spacer from the output shaft.
REMOVE 4TH GEAR
Remove the 4th gear from the output shaft.
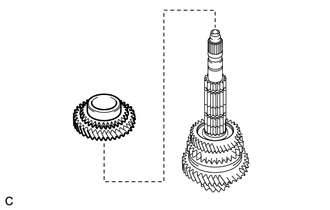
REMOVE NO. 2 TRANSMISSION CLUTCH HUB WITH NO. 2 TRANSMISSION HUB SLEEVE
-

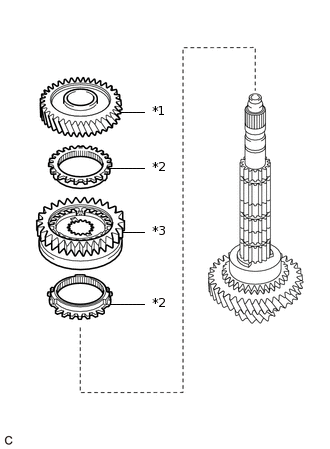
*1
Output Shaft Spacer
*2
4th Gear
*3
No. 2 Synchronizer Ring Set
*4
No. 2 Transmission Clutch Hub with No. 2 Transmission Hub Sleeve
Remove the 2 No. 2 synchronizer ring sets and No. 2 transmission clutch hub with No. 2 transmission hub sleeve from the output shaft.
Note:Do not remove the No. 2 transmission clutch hub as the synchromesh shifting key balls, compression springs, and No. 2 synchromesh shifting keys may fly out.
-
REMOVE NO. 2 TRANSMISSION CLUTCH HUB
Tip:Perform this procedure only when replacing the 3 synchromesh shifting key balls, 3 compression springs or 3 No. 2 synchromesh shifting keys.
-
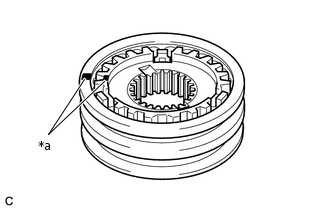
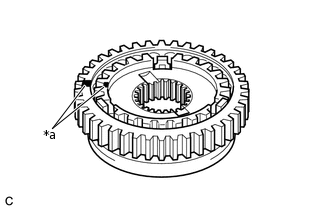
*a
Matchmark
Put matchmarks on the No. 2 transmission clutch hub and No. 2 transmission hub sleeve.
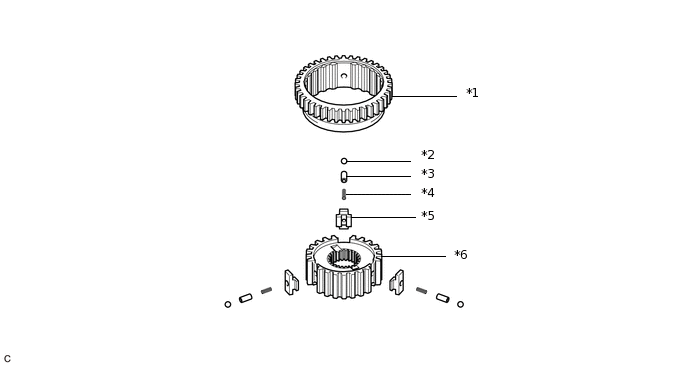
Remove the No. 2 transmission hub sleeve, 3 synchromesh shifting key balls, 3 compression springs and 3 No. 2 synchromesh shifting keys from the No. 2 transmission clutch hub.
Note:Take care to prevent the synchromesh shifting key balls and compression springs from scattering.
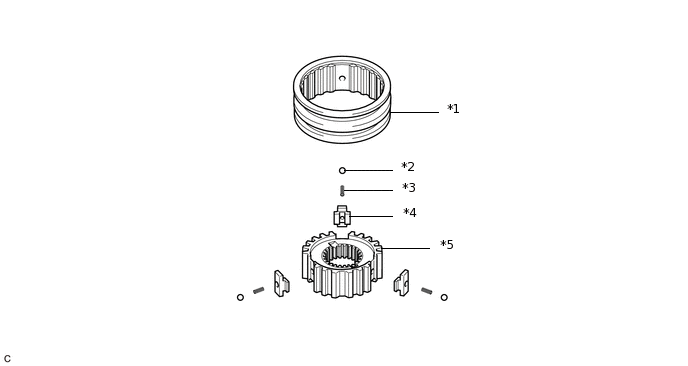
*1
No. 2 Transmission Hub Sleeve
*2
Synchromesh Shifting Key Ball
*3
Compression Spring
*4
No. 2 Synchromesh Shifting Key
*5
No. 2 Transmission Clutch Hub
-
-
-
REMOVE NO. 2 3RD GEAR SHAFT SNAP RING
-
Hold the output shaft in a vise between aluminum plates.
Note:Do not overtighten the vise.
Using 2 screwdrivers and a hammer, remove the No. 2 3rd gear shaft snap ring from the output shaft.
Tip:Use a piece of cloth to prevent the No. 2 3rd gear shaft snap ring from flying off.
-
REMOVE 3RD GEAR
Remove the 3rd gear from the output shaft.
REMOVE NO. 1 3RD REAR SHAFT SNAP RING
-
Using 2 screwdrivers and a hammer, remove the No. 1 3rd gear shaft snap ring from the output shaft.
Note:Use a piece of cloth to prevent the No. 1 3rd gear shaft snap ring from flying off.
-
REMOVE 2ND GEAR
Remove the 2nd gear from the output shaft.
REMOVE NO. 1 TRANSMISSION CLUTCH HUB WITH NO. 1 TRANSMISSION HUB SLEEVE
-
*1
2nd Gear
*2
No. 1 Synchronizer Ring Set
*3
No. 1 Transmission Clutch Hub with No. 1 Transmission Hub Sleeve
Remove the 2 No. 1 synchronizer ring sets and No. 1 transmission clutch hub with No. 1 transmission hub sleeve from the output shaft.
Note:Do not remove the No. 1 transmission clutch hub as the synchromesh shifting key balls, compression springs, ball seats, and No. 1 synchromesh shifting keys may fly out.
-
REMOVE NO. 1 TRANSMISSION CLUTCH HUB
Tip:Perform this procedure only when replacing the 3 synchromesh shifting key balls, 3 ball seats, 3 compression springs or 3 No. 1 synchromesh shifting keys.
-
*a
Matchmark
Put matchmarks on the No. 1 transmission clutch hub and No. 1 transmission hub sleeve.
Remove the No. 1 transmission hub sleeve, 3 synchromesh shifting key balls, 3 compression springs, 3 ball seats and 3 No. 1 synchromesh shifting keys from the No. 1 transmission clutch hub.
Note:Take care to prevent the synchromesh shifting key balls, ball seats and compression springs from scattering.
*1
No. 1 Transmission Hub Sleeve
*2
Synchromesh Shifting Key Ball
*3
Ball Seat
*4
Compression Spring
*5
No. 1 Synchromesh Shifting Key
*6
No. 1 Transmission Clutch Hub
-
REMOVE NO. 2 1ST GEAR SHAFT SNAP RING
-

Using 2 screwdrivers and a hammer, remove the No. 2 1st gear shaft snap ring from the output shaft.
Tip:Use a piece of cloth to prevent the No. 2 1st gear shaft snap ring from flying off.
-
REMOVE 1ST GEAR
Remove the 1st gear from the output shaft.
REMOVE NO. 1 1ST GEAR SHAFT SNAP RING
-
Using 2 screwdrivers and a hammer, remove the No. 1 1st gear shaft snap ring from the output shaft.
Tip:Use a piece of cloth to prevent the No. 1 1st gear shaft snap ring from flying off.
-
REMOVE OUTPUT SHAFT FRONT BEARING
-
Using SST and a press, remove the output shaft front bearing from the output shaft.
09950-00020
Note:Do not excessively tighten SST.
Support the output shaft by hand to prevent it from dropping.
-