LUGGAGE COMPARTMENT DOOR WEATHERSTRIP REMOVAL
CAUTION / NOTICE / HINT
The necessary procedures (adjustment, calibration, initialization, or registration) that must be performed after parts are removed, installed, or replaced during the luggage compartment door weatherstrip removal/installation are shown below.
| Replacement Part | Necessary Procedure | Effect/Inoperative Function When Necessary Procedures are not Performed | Link |
|---|---|---|---|
| Rear bumper assembly (Including removal and installation) |
|
Parking support brake system | |
| When the luggage compartment door is opened using a mechanical key | Initialize luggage closer motor assembly | The power trunk lid does not operate |
PROCEDURE
-
REMOVE REAR BUMPER COVER
-
REMOVE BACK WINDOW LOWER OUTSIDE MOULDING
-

Protective Tape Apply protective tape around the back window lower outside moulding as shown in the illustration.
-
Using a moulding remover B, detach the clip.
-

Remove in this Direction Using a thin-bladed screwdriver, detach the claw as shown in the illustration.
-
With the claw detached, lift the back window lower outside moulding toward the top of the vehicle, and then remove the back window lower outside moulding.
Note
If the claw is damaged, replace the No. 1 windshield outside moulding clip with a new one.
Tech Tips
Detach the claws individually and do not use excessive force.
-
-
REMOVE NO. 1 WINDSHIELD OUTSIDE MOULDING CLIP
Tech Tips
Perform the following procedure when replacing the No. 1 windshield outside moulding clip.
-
Detach the claw and remove the 5 No. 1 windshield outside moulding clips as shown in the illustration.
Remove in this Direction - -
-
-
REMOVE NO. 3 WINDSHIELD OUTSIDE MOULDING CLIP
Tech Tips
Perform the following procedure when replacing the No. 3 windshield outside moulding clip.
-
Set a 4.0 mm diameter drill bit into an air drill.
-
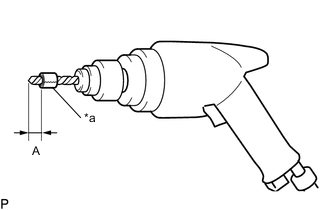
*a Wind Vinyl Tape Wind vinyl tape around the 4.0 mm diameter drill bit 5.0 mm from the tip of the drill.
Standard Value Area Standard Value A 5.0 mm (0.197 in.) Tech Tips
Wind vinyl tape around the drill bit to prevent drilling too deep.
-
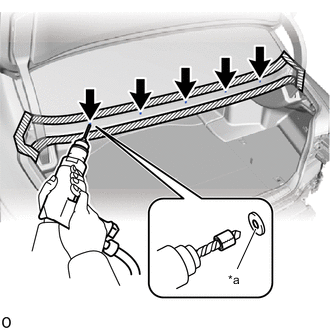
*a Flanges Lightly press the air drill against the No. 3 windshield outside moulding clip, drill off the flanges of the No. 3 windshield outside moulding clip and remove the 5 No. 3 windshield outside moulding clips.
CAUTION:
Be careful of the drilled No. 3 windshield outside moulding clip, as it is hot.
Note
-
Protect the vehicle and be careful, as shards of the drilled No. 3 windshield outside moulding clip may scatter.
-
Pressing the air drill excessively will cause the No. 3 windshield outside moulding clip to turn and result in the No. 3 windshield outside moulding clip not being drilled.
-
Do not pry the No. 3 windshield outside moulding clip with the air drill. This may cause damage to the installation holes of the No. 3 windshield outside moulding clip or the drill bit.
-
-
-
REMOVE LUGGAGE COMPARTMENT DOOR COVER LH
Tech Tips
When removing the luggage compartment door cover LH, heat the vehicle body and luggage compartment door cover LH using a heat light.
Standard Item Temperature Vehicle Body 40 to 60°C (104 to 140°F) Luggage Compartment Door Cover LH 20 to 30°C (68 to 86°F) CAUTION:
-
Do not touch the heat light and heated parts.
-
Touching the heat light may result in burns.
-
Touching heated parts for a long time may result in burns.
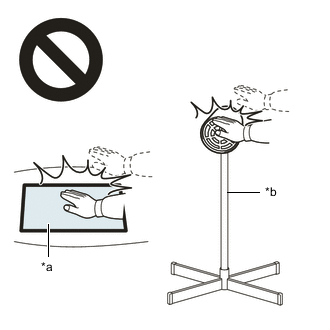
*a Heated Part *b Heat Light
-
Double-sided Tape Using a clip remover, detach the clip.
-
Remove the double-sided tape and luggage compartment door cover LH.
-
-
REMOVE LUGGAGE COMPARTMENT DOOR COVER RH
Tech Tips
Use the same procedure for the RH and LH sides.
-
REMOVE LUGGAGE COMPARTMENT FLOOR MAT
-
REMOVE LUGGAGE COMPARTMENT TRIM COVER LH
-
REMOVE LUGGAGE COMPARTMENT TRIM COVER RH
-
REMOVE LUGGAGE COMPARTMENT TRIM BOX (w/ Luggage Compartment Trim Box)
-
REMOVE ROPE HOOK ASSEMBLY
-
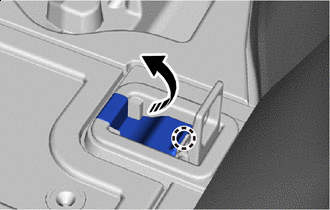
Open Detach the claw and open the cap.
-
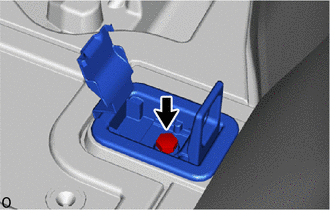
Remove the bolt and rope hook assembly.
Tech Tips
Use the same procedure for the RH and LH sides.
-
-
REMOVE REAR FLOOR FINISH PLATE
-
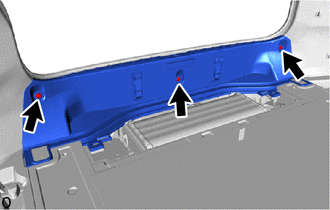
Using a clip remover, remove the 3 clips.
-
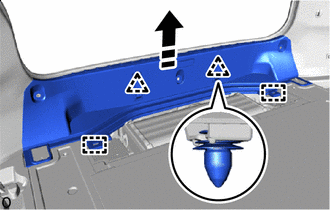
Remove in this Direction Detach the clip and guide and remove the rear floor finish plate.
-
-
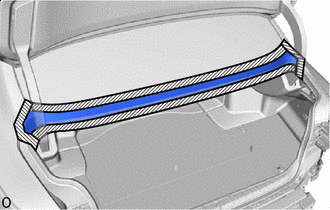
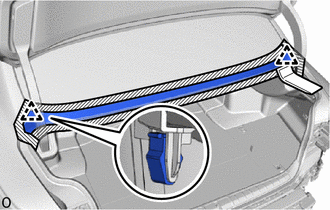
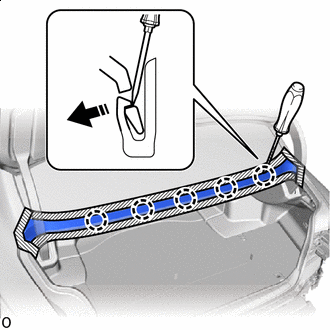
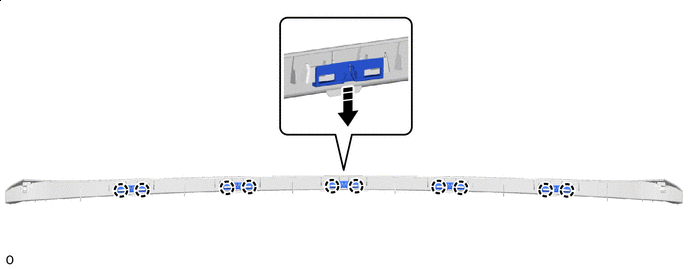
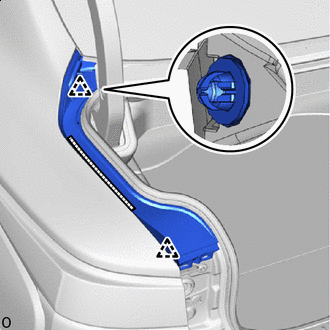
REMOVE LUGGAGE COMPARTMENT DOOR WEATHERSTRIP
-

While avoiding the luggage compartment door, remove the luggage compartment door weatherstrip.
Note
When removing, make sure that non-drying sealer does not adhere to the body and luggage compartment door.
-