RADIO ANTENNA CORD INSTALLATION
PROCEDURE
INSTALL NO. 2 ANTENNA CORD SUB-ASSEMBLY
Apply new double-sided tape as shown in the illustration.
Tip:Attach double-sided tape to the hatched areas shown in the illustration below.
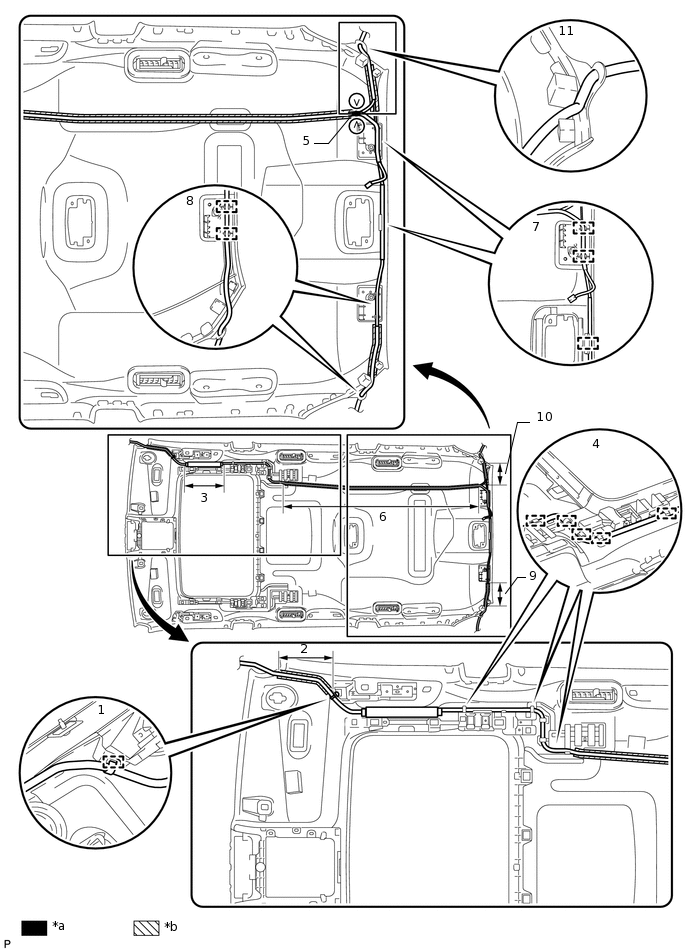
*a
Marking Tape
*b
Double-sided Tape
Attach the clamp in the part of the illustration labeled 1.
Align the antenna cord with the marking in the part of the illustration labeled 2 and attach it to the double-sided tape.
Align the antenna cord with the marking in the part of the illustration labeled 3 and attach it to the double-sided tape.
Attach the 5 clamps in the part of the illustration labeled 4.
Align the marking tape on the antenna cord with the V mark on the roof headlining in the part of the illustration labeled 5.
While gathering the slack in the antenna cord in the part of the illustration labeled 6, align the antenna cord with the marking and attach it to the double-sided tape.
Attach the clamps in the parts of the illustration labeled 7 and 8.
Align the antenna cord with the marking in the part of the illustration labeled 9 and attach it to the double-sided tape.
Align the antenna cord with the marking in the part of the illustration labeled 10 and attach it to the double-sided tape.
Attach the antenna cord to the notches in the roof headlining in the parts of the illustration labeled 8 and 11.
INSTALL ROOF HEADLINING ASSEMBLY
Install the roof headlining assembly (Click here).
CONNECT CABLE TO NEGATIVE BATTERY TERMINAL
Note:When disconnecting the cable, some systems need to be initialized after the cable is reconnected (Click here).
CHECK SRS WARNING LIGHT
Check the SRS warning light (Click hereClick here).