FRONT CRANKSHAFT OIL SEAL REMOVAL
PROCEDURE
REMOVE FRONT WHEEL RH
SEPARATE FRONT FENDER LINER RH
Remove the 3 bolts, 2 screws and 2 clips, and separate the front fender liner RH.
REMOVE V-RIBBED BELT
REMOVE OIL FILTER BRACKET
SUPPORT ENGINE ASSEMBLY
-

*a
Plate Lift Attachment
Using a jack and plate lift attachment, support the engine assembly.
-
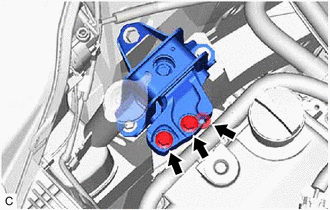
Remove the 2 bolts and nut, and separate the engine mounting insulator sub-assembly RH from the timing chain cover sub-assembly.
-
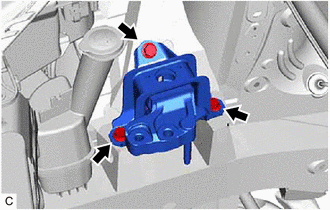
Remove the 3 bolts and engine mounting insulator sub-assembly RH from the vehicle body.
Lower the engine slightly.
Note:Do not lower the engine excessively.
-
REMOVE CRANKSHAFT PULLEY
-
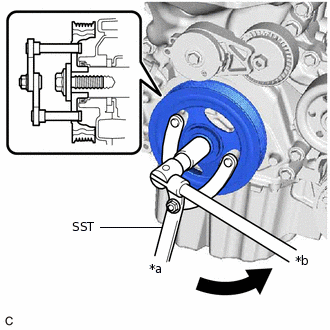
*a
Hold
*b
Turn
Using SST, hold the crankshaft pulley in place and loosen the crankshaft pulley set bolt.
09960-10010
09962-01000
09963-01000
-
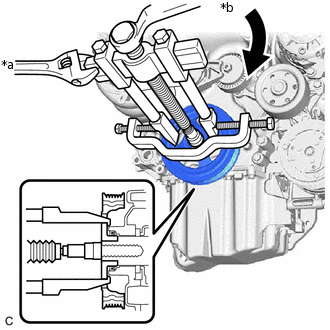
*a
Hold
*b
Turn
Tighten the crankshaft pulley set bolt until 2 or 3 threads are screwed into the crankshaft.
Using SST, remove the crankshaft pulley and crankshaft pulley set bolt.
09950-40011
09951-04010
09953-04030
09958-04011
09955-04011
09952-04010
09954-04020
09957-04010
09950-60010
09952-06010
09951-00420
09951-00430
-
REMOVE TIMING CHAIN COVER OIL SEAL
-
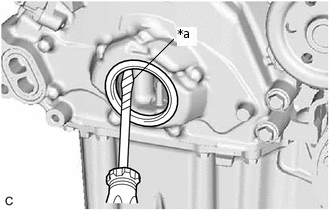
*a
Protective Tape
Using a screwdriver, pry out the timing chain cover oil seal.
Note:After removal, check the crankshaft for damage. If damaged, smooth the surface with 400-grit sandpaper.
Tip:Tape the screwdriver tip before use.
-