REAR NO. 1 SEAT ASSEMBLY(for Side) DISASSEMBLY
PROCEDURE
-
REMOVE SEAT ADJUSTER COVER CAP
-
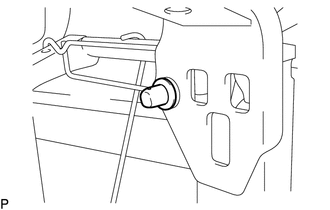
Remove the seat adjuster cover cap.
Tech Tips
Use the same procedure for the RH side and LH side.
-
-
REMOVE RECLINING CONTROL LEVER
-
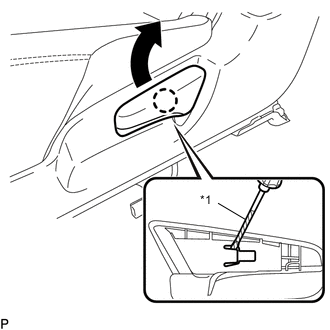
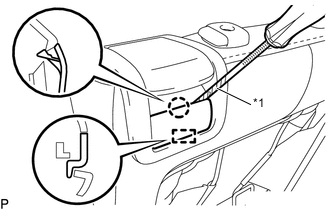
Text in Illustration *1 Protective Tape Using a screwdriver with its tip wrapped with protective tape, disengage the claw and remove the reclining control lever.
-
-
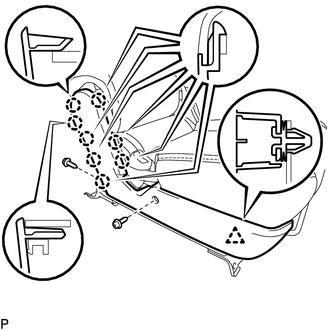
REMOVE REAR SEAT CUSHION MOULDING LH
-
Remove the 2 screws.
-
Disengage the 10 claws and clip to remove the rear seat cushion moulding LH.
-
-
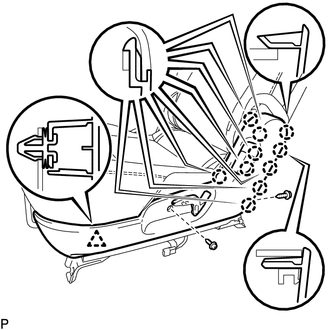
REMOVE REAR SEAT CUSHION MOULDING RH
-
Remove the 2 screws.
-
Disengage the 8 claws and clip to remove the rear seat cushion moulding RH.
-
-
REMOVE REAR SEAT 3 POINT TYPE BELT ASSEMBLY
-
REMOVE REAR NO. 1 SEAT BEZEL COVER
-
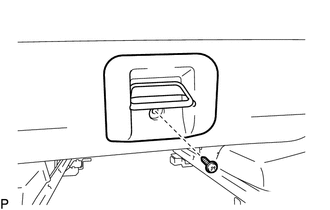
Remove the screw and rear No. 1 seat bezel cover.
-
-
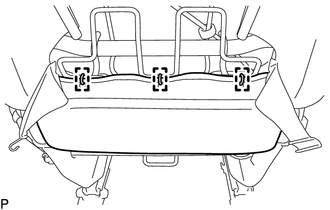
REMOVE NO. 1 SEAT CUSHION COVER WITH PAD
-
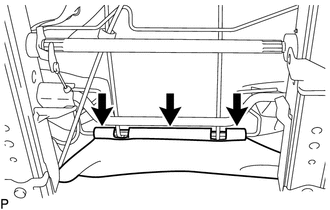
Disengage the 3 hooks.
-
Disengage each hook and remove the No. 1 seat cushion cover with pad.
-
-
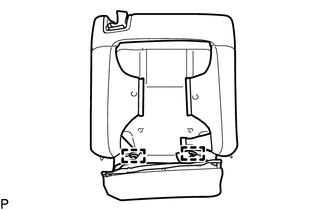
REMOVE NO. 1 SEAT CUSHION COVER SUB-ASSEMBLY
-
Remove the 5 hog rings.
-
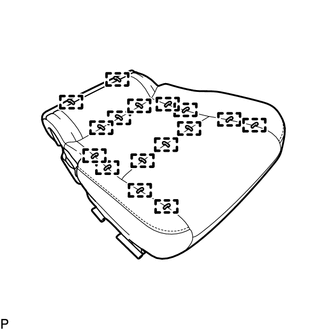
Remove the 16 hog rings and remove the No. 1 seat cushion cover sub-assembly from the No. 1 seat cushion pad sub-assembly.
-
-
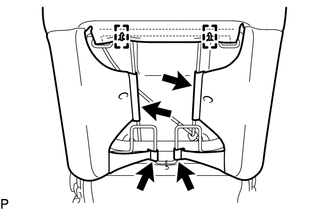
REMOVE REAR SEATBACK BOARD
-
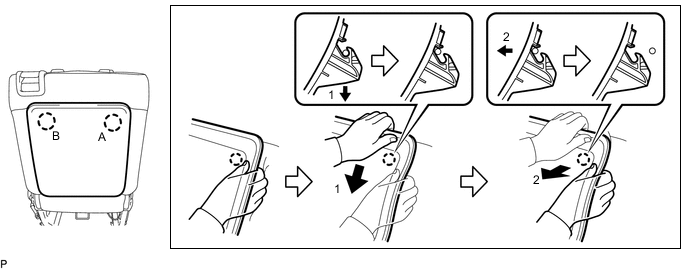
Hold the rear seatback board at the position shown in the illustration.
-
Push the rear seatback board in the direction indicated by the arrow (1) shown in the illustration.
-
Pull the rear seatback board in the direction indicated by the arrow (2) shown in the illustration to disengage the claw (A).
-
Disengage the claw (B).
Tech Tips
Use the same procedure as for the claw (A).
-

Disengage the 2 claws to remove the rear seatback board as shown in the illustration.
-
-
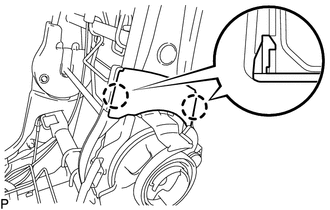
REMOVE REAR SEATBACK LOCK STRIKER COVER
-
Text in Illustration *1 Protective Tape Using a screw driver with its tips wrapped with protective tape, disengage the guide and claw, and remove the rear seatback lock striker cover.
-
-
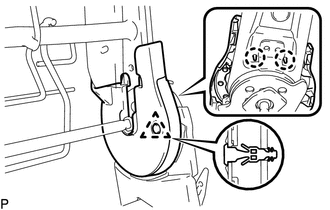
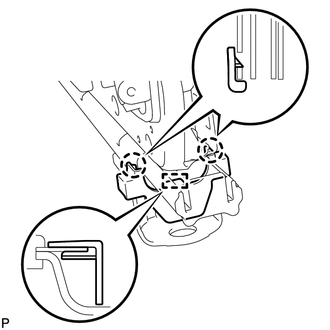
REMOVE REAR SEAT LOCK CONTROL LEVER SUB-ASSEMBLY
-

Remove the 2 screws.
-
Disengage the 2 guides.
-
Disengage the 2 cable clamps and remove the rear seat lock control lever sub-assembly.
-
-
REMOVE REAR NO. 1 SEAT HEADREST SUPPORT ASSEMBLY
-
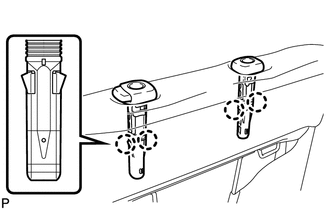
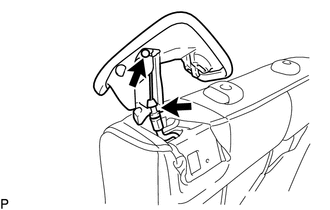
Disengage the 4 claws and remove the 2 rear No. 1 seat headrest support assemblies.
-
-
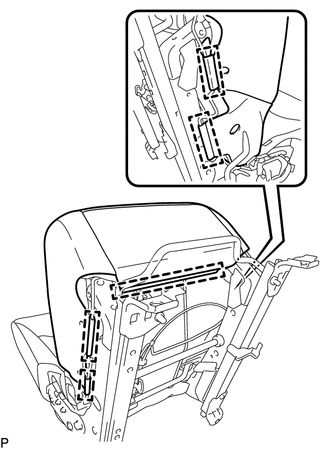
REMOVE NO. 1 SEATBACK COVER WITH PAD
-
Disengage the 4 hooks.
-
Remove the 2 hog rings.
-
Remove the 3 hog rings.
-
Disengage the 2 hooks.
-
Remove the No. 1 seatback cover with pad from the rear seatback frame sub-assembly.
-
-
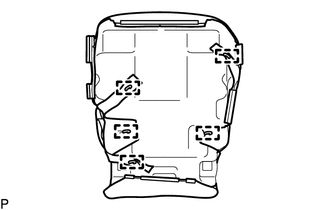
REMOVE NO. 1 SEATBACK COVER SUB-ASSEMBLY
-
Remove the 2 hog rings.
-
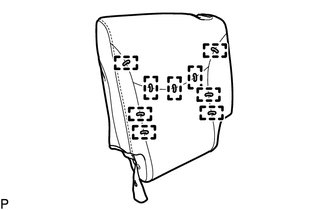
Remove the 9 hog rings and remove the No. 1 seatback cover sub-assembly from the No. 1 seatback pad sub-assembly.
-
-
REMOVE NO. 1 RECLINING REMOTE CONTROL LEVER BEZEL
-
Disengage the claw and guide, and remove the No. 1 reclining remote control lever bezel.
-
-
REMOVE NO. 1 RECLINING ADJUSTER RELEASE HANDLE
-
Text in Illustration *1 Protective Tape Using a screwdriver with its tip wrapped with protective tape, disengage the claw and remove the No. 1 reclining adjuster release handle.
-
-
REMOVE RECLINING ADJUSTER INSIDE COVER LH
-
Disengage the 2 claws and remove the reclining adjuster inside cover LH.
-
-
REMOVE RECLINING ADJUSTER INSIDE COVER RH
Tech Tips
Use the same procedure as for the LH side.
-
REMOVE NO. 2 REAR SEAT RECLINING COVER
-
Disengage the clip and 2 claws, and remove the No. 2 rear seat reclining cover.
-
-
REMOVE NO. 1 REAR SEAT RECLINING COVER
Tech Tips
Use the same procedure as for the No. 2 rear seat reclining cover.
-
REMOVE REAR SEAT CUSHION HINGE COVER
-
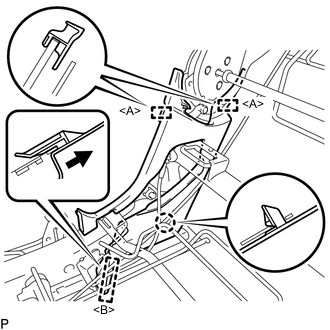
Disengage the 2 guides <A>.
-
Disengage the claw.
-
Disengage the guide <B> and remove the rear seat cushion hinge cover as shown in the illustration.
-
-
REMOVE RECLINING HINGE COVER
-
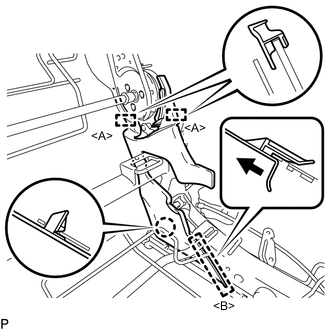
Disengage the 2 guides <A>.
-
Disengage the claw.
-
Disengage the guide <B> and remove the reclining hinge cover as shown in the illustration.
-
-
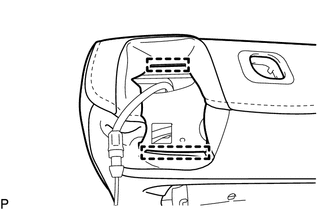
REMOVE RECLINING REMOTE CONTROL CABLE ASSEMBLY
-
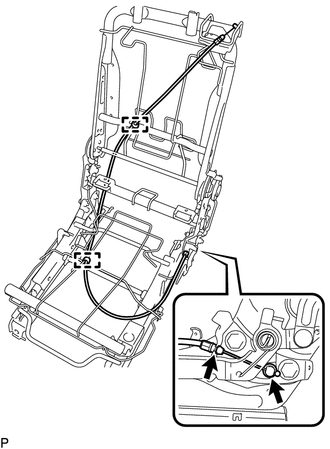
Remove the 2 clamps.
-
Disengage the 2 cable clamps and remove the reclining remote control cable assembly.
-
-
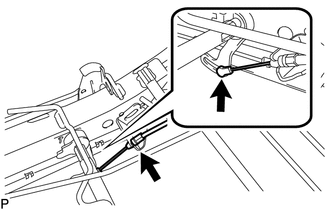
REMOVE REAR SEAT LEG SIDE COVER
-
Disengage the 2 claws and guide, and remove the rear seat leg side cover.
-
-
REMOVE REAR SEATBACK FRAME SUB-ASSEMBLY
-
Disengage the 2 cable clamps.
-
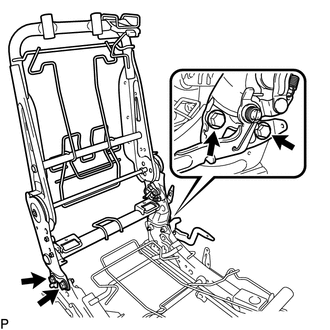
Remove the 4 bolts and rear seatback frame sub-assembly from the rear seat cushion frame sub-assembly.
-
-
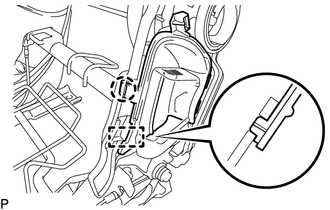
REMOVE REAR SEAT TRACK ADJUSTING HANDLE
-
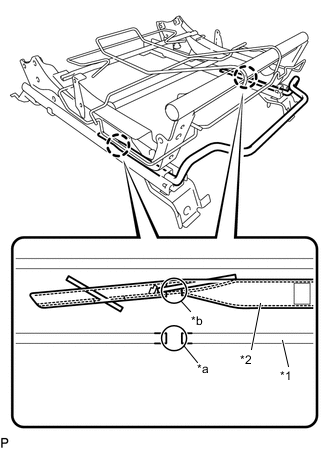
Text in Illustration *1 Rear Seat Adjuster *2 Rear Seat Track Adjusting Handle *a Rear Seat Adjuster Hole *b Rear Seat Track Adjusting Handle Hole Operate the rear seat track adjusting handle to slide the rear seat adjuster so that each rear seat track adjusting handle hole can be seen through each rear seat adjuster hole as shown in the illustration.
-
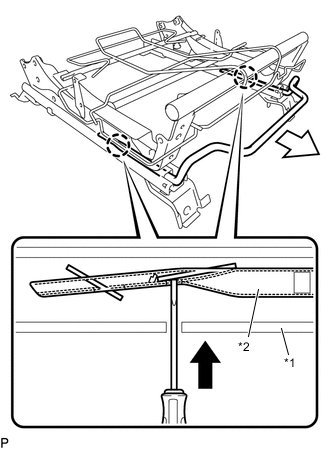
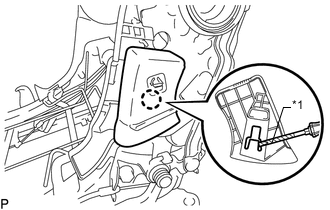
Text in Illustration *1 Rear Seat Adjuster *2 Rear Seat Track Adjusting Handle Insert a screwdriver into the rear seat adjuster hole as shown in the illustration and disengage the 2 claws.
-
Remove the rear seat track adjusting handle from the rear seat cushion frame sub-assembly as shown in the illustration.
-