DYNAMIC TORQUE CONTROL AWD SYSTEM DTC CHECK / CLEAR

-
CHECK DTC (When Using GTS)
-
Check the DTCs.
-
Connect the GTS to the DLC3.
-
Turn the engine switch on (IG).
-
Turn the GTS on.
-
Read the DTCs following the prompts on the GTS screen. Enter the following menus: Chassis / Four Wheel Drive / Trouble Codes.
Chassis > Four Wheel Drive > Trouble Codes -
Check the details of the DTCs.
-
-
-
CLEAR DTC (When Using GTS)
-
Clear the DTCs.
-
Connect the GTS to the DLC3.
-
Turn the engine switch on (IG).
-
Turn the GTS on.
-
Operate the GTS to clear the DTCs. Enter the following menus: Chassis / Four Wheel Drive / Trouble Codes.
Chassis > Four Wheel Drive > Clear DTCs -
According to the display on the GTS, select the trouble code data display with the clear button.
-
-
-
CHECK DTC (When Using SST Check Wire)
-
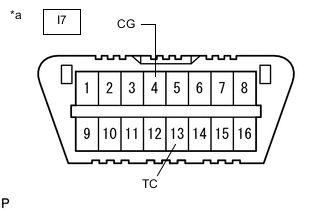
*a Front view of DLC3 Check the DTCs.
-
Using SST, connect terminals 13 (TC) and 4 (CG) of the DLC3.
- SST
- 09843-18040
-
Turn the engine switch on (IG).
-
Read the DTCs displayed on the multi-information display.
Tech Tips
-
"DAIG AWD" is displayed on the multi-information display, and the 4WD ECU assembly checks the system for malfunctions.
-
If the dynamic torque control AWD system is normal, "DAIG AWD FF" will be displayed on the multi-information display (normal system code).
-
If the dynamic torque control AWD system is not normal, "DIAG AWD XX (DTC)" will be displayed on the multi-information display.
-
DTCs are explained in "DIAGNOSTIC TROUBLE CODE CHART".
-
If no DTCs are displayed on the multi-information display, perform the relevant troubleshooting procedures. The relevant troubleshooting procedures are in the sections listed in the table below.
Section Title See Procedure AWD Warning Light does not Come ON TC and CG Terminal Circuit
-
-
-
-
CLEAR DTC (When Using SST Check Wire)
-
Using SST, connect terminals 13 (TC) and 4 (CG) of the DLC3.
- SST
- 09843-18040
-
Turn the engine switch on (IG).
-
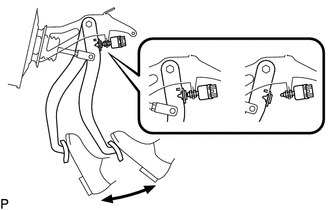
Clear the DTCs stored in the 4WD ECU assembly by depressing the brake pedal 8 times or more within 5 seconds.
-
Check that the AWD warning (multi-information display) displays "DAIG AWD FF".
-
Remove SST from the terminals of the DLC3.
-
Turn the engine switch off.
Tech Tips
DTCs cannot be cleared by disconnecting the cable from the negative (-) battery terminal or removing the ECU-IG NO. 6 fuse.
-