RADIATOR GRILLE INSTALLATION
PROCEDURE
INSTALL RADIATOR GRILLE
Engage the 8 claws to install the radiator grille.
INSTALL UPPER RADIATOR GRILLE MOULDING LH
Engage the 4 claws to install the upper radiator grille moulding LH.
INSTALL UPPER RADIATOR GRILLE MOULDING RH
Tip:Use the same procedure as for the LH side.
INSTALL RADIATOR GRILLE (OR FRONT PANEL) EMBLEM
-

Engage the 2 guides and 2 claws to install the radiator grille (or front panel) emblem as shown in the illustration.
-
INSTALL NO. 1 RADIATOR GRILLE SEAL
-
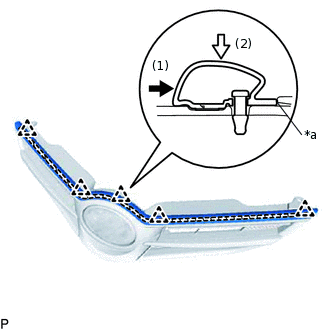
*a
No clearance

Double-sided Tape
Clean off any tape adhesive residue with cleaner.
Engage the 5 clips and install a new No. 1 radiator grille seal.
Press the No. 1 radiator grille seal in the direction indicated by the arrow (1) in the illustration until it contacts the edge of the radiator grille to determine the installation position.
Remove the release paper from the No. 1 radiator grille seal.
Press the double-sided tape of the No. 1 radiator grille seal in the direction indicated by the arrow (2) in the illustration.
Tip:Press the No. 1 radiator grille seal with a force of 39 N (4 kgf, 8.8 lbf) or more.
-
INSTALL RADIATOR GRILLE SUB-ASSEMBLY
-
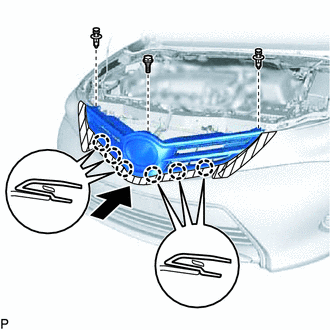
Engage the 6 claws as shown in the illustration.
Install the radiator grille sub-assembly with the bolt and 2 clips.
-