EXHAUST MANIFOLD REMOVAL
PROCEDURE
REMOVE NO. 1 ENGINE COVER SUB-ASSEMBLY
REMOVE NO. 1 ENGINE UNDER COVER
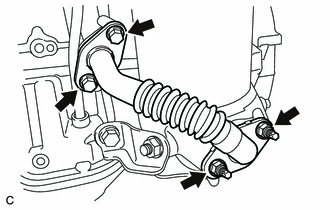
REMOVE FRONT EXHAUST PIPE ASSEMBLY
-
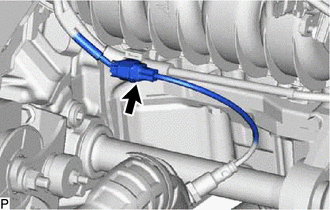
Disconnect the heated oxygen sensor connector.
Remove the 2 bolts and disconnect the front exhaust pipe sub-assembly from the center exhaust pipe assembly.
Remove the gasket from the front exhaust pipe sub-assembly.
Remove the 2 bolts, 2 compression springs and front exhaust pipe sub-assembly.
Remove the gasket from the exhaust manifold converter sub-assembly.
-
REMOVE NO. 1 EXHAUST MANIFOLD HEAT INSULATOR
-
Remove the 4 bolts and No. 1 exhaust manifold heat insulator.
-
DISCONNECT WIRE HARNESS
DISCONNECT INVERTER RESERVE TANK ASSEMBLY
REMOVE AIR FUEL RATIO SENSOR
REMOVE NO. 1 MANIFOLD CONVERTER INSULATOR
-

Remove the 3 bolts and No. 1 manifold converter insulator.
-
REMOVE NO. 2 EGR PIPE (w/ EGR System)
-
Remove the 2 bolts, 2 nuts and No. 2 EGR pipe.
Remove the 2 gaskets.
-
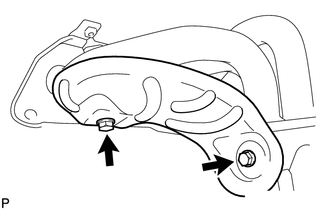
REMOVE NO. 2 MANIFOLD STAY
-
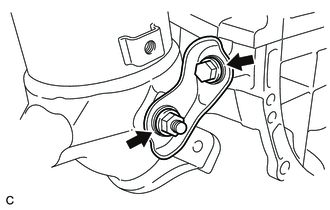
Remove the bolt, nut and No. 2 manifold stay.
-
REMOVE MANIFOLD STAY
-
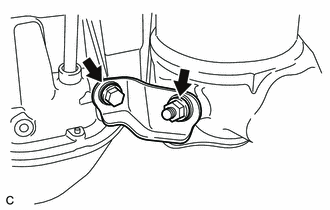
Remove the bolt, nut and manifold stay.
-
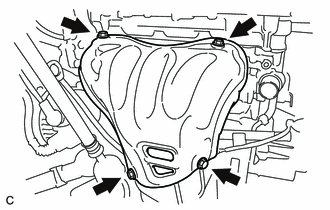
REMOVE EXHAUST MANIFOLD CONVERTER SUB-ASSEMBLY
-
Remove the 5 nuts and exhaust manifold converter sub-assembly.
-
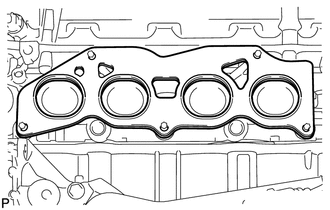
Remove the exhaust manifold to head gasket.
-
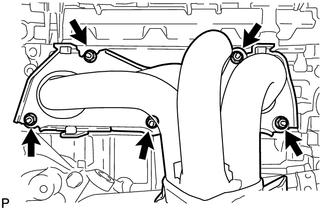
REMOVE NO. 2 EXHAUST MANIFOLD HEAT INSULATOR
-
Remove the 2 bolts and No. 2 exhaust manifold heat insulator.
-