TRANSMISSION CONTROL CABLE REMOVAL
PROCEDURE
-
SECURE VEHICLE
-
Fully apply the parking brake and chock a wheel.
CAUTION:
-
Make sure to apply the parking brake and chock a wheel before performing this procedure.
-
If the vehicle is not secure and the shift lever is moved to N, the vehicle may suddenly move, possibly resulting in an accident or serious injury.
-
-
-
REMOVE AIR CLEANER CAP WITH AIR CLEANER HOSE
-
REMOVE AIR CLEANER FILTER ELEMENT SUB-ASSEMBLY
-
REMOVE AIR CLEANER CASE SUB-ASSEMBLY
-
REMOVE AIR CLEANER BRACKET
-
REMOVE CONSOLE BOX ASSEMBLY
-
REMOVE FRONT NO. 1 CONSOLE BOX INSERT
-
REMOVE FRONT NO. 2 CONSOLE BOX INSERT
-
REMOVE TRANSMISSION CONTROL CABLE ASSEMBLY
-
Move the shift lever to N.
-

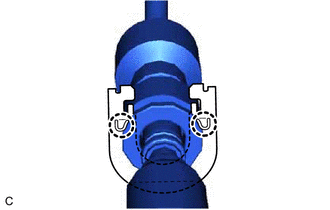
Disconnect the transmission control cable assembly from the transmission floor shift assembly.
-
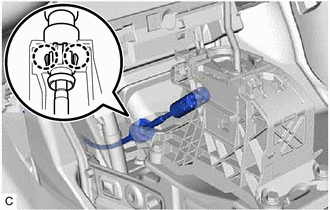
Disengage the 2 claws and disconnect the transmission control cable assembly from the transmission floor shift assembly.
-
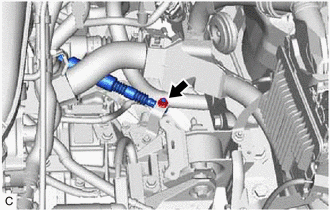
Remove the nut and disconnect the transmission control cable assembly from the transmission control shaft lever.
-
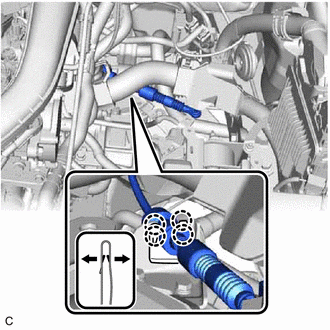
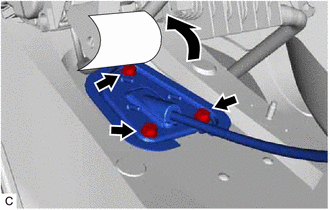
Using a screwdriver, disengage the 4 claws and disconnect the transmission control cable assembly with the clip from the No. 1 transmission control cable bracket.
-
Using a screwdriver, disengage the 2 claws and remove the clip from the transmission control cable assembly.
-
Turn back the floor carpet.
-
Remove the 3 bolts and remove the transmission control cable assembly from the cabin.
-