REAR SHOCK ABSORBER REMOVAL
CAUTION / NOTICE / HINT
Use the same procedure for the RH and LH sides.
The procedure listed below is for the LH side.
PROCEDURE
REMOVE REAR WHEEL
REMOVE REAR SUSPENSION ARM COVER LH (w/ Cover)
REMOVE REAR SHOCK ABSORBER ASSEMBLY LH
-
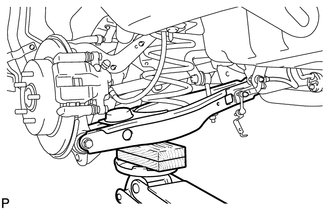
Support the rear No. 2 suspension arm assembly LH with a jack using a wooden block to avoid damage.
Note:Do not excessively jack up the rear No. 2 suspension arm assembly LH.
Tip:Support the rear shock absorber at a position where it compresses by approximately 20 to 30 mm (0.788 to 1.181 in.).
-
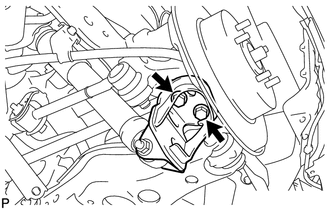
Remove the 2 bolts and disconnect the rear shock absorber assembly LH with the rear shock absorber bracket LH.
-
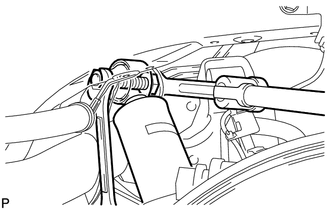
Using a 17 mm ball joint lock nut wrench, remove the bolt and nut on the upper side, and then remove the rear shock absorber assembly LH with rear No. 1 shock absorber bracket LH.
-
REMOVE REAR NO. 1 SHOCK ABSORBER BRACKET LH
-
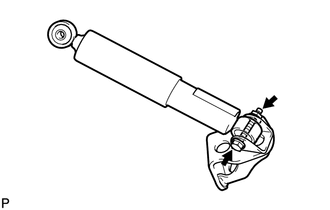
Remove the nut and bolt from the rear No. 1 shock absorber bracket LH.
-