TRANSMISSION CONTROL CABLE INSTALLATION
PROCEDURE
INSTALL TRANSAXLE CONTROL CABLE ASSEMBLY
Install the retainer with the 2 bolts.
5.0 N*m
51 kgf*cm
44 in.*lbf
-
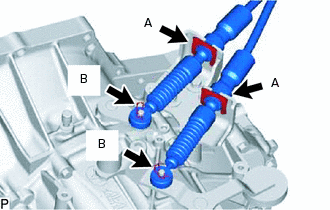
Connect the 2 transaxle control cables to the control cable bracket with 2 new clips labeled A.
Connect the 2 transaxle control cables to the manual transaxle assembly and install the 2 clips labeled B.
CONNECT TRANSAXLE CONTROL CABLE ASSEMBLY
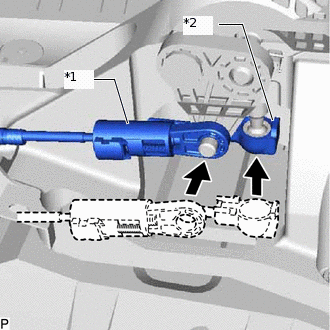
Turn the lock nut of the transaxle control cable assembly 180° clockwise. While holding the lock nut in place, push in the stopper to lock the lock nut.
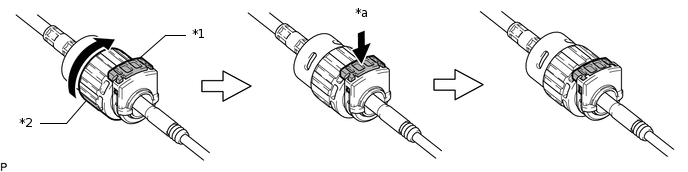
*1
Cable Lock
*2
Lock Nut
*a
Push in
-
-
Note:Do not over-rotate the nut as it will come off the internal spring and the transaxle control cable assembly will not be reusable.
Tip:If the stopper cannot be pushed in, slightly turn the nut counterclockwise and then push in the cable lock again.
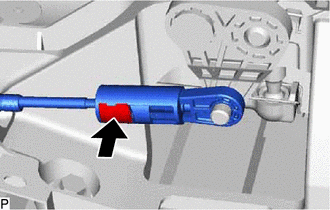
Connect the outer part of the transaxle control cable assembly to the floor shift shift lever assembly. Check that the stopper returns to the pulled-out position.
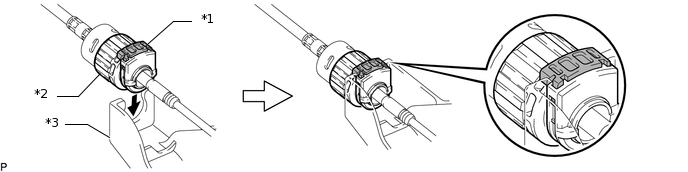
*1
Cable Lock
*2
Lock Nut
*3
Floor Shift Shift Lever Assembly
-
-
-
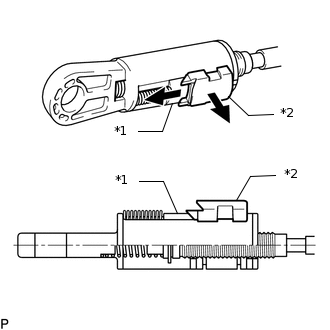
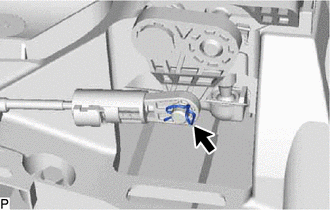
*1
Slider
*2
Lock Piece
Slide the slider in the direction shown in the illustration and pull out the lock piece.
-
*1
Select Conrol Cable
*2
Shift Control Cable
Connect the shift control cable to the floor shift shift lever assembly.
Gently pull the cable rod toward the rear of the vehicle by hand to pull the cable taut.
-
Push the lock piece into the adjuster case and lock it.
Note:Make sure that the lock piece is completely locked by the slider.
-
Install a new clip to the select control cable.
Tip:Install a new clip.
ADJUST TRANSMISSION CONTROL CABLE ASSEMBLY
INSTALL REAR CONSOLE BOX SUB-ASSEMBLY
INSTALL AIR CLEANER CASE SUB-ASSEMBLY
INSTALL AIR CLEANER FILTER ELEMENT
INSTALL AIR CLEANER CAP SUB-ASSEMBLY
INSTALL NO. 2 CYLINDER HEAD COVER