WATER PUMP REMOVAL
-
DISCONNECT CABLE FROM NEGATIVE BATTERY TERMINAL
-
REMOVE ENGINE UNDER COVER NO.1
-
DRAIN ENGINE COOLANT
CAUTION:
Do not remove the radiator reservoir cap sub-assembly while the engine and radiator are still hot. Pressurized, hot engine coolant and steam may be released and cause serious burns.
Tech Tips
Collect the engine coolant in a container and dispose of it according to local regulations.
-
Loosen the radiator drain cock plug and drain the engine coolant.
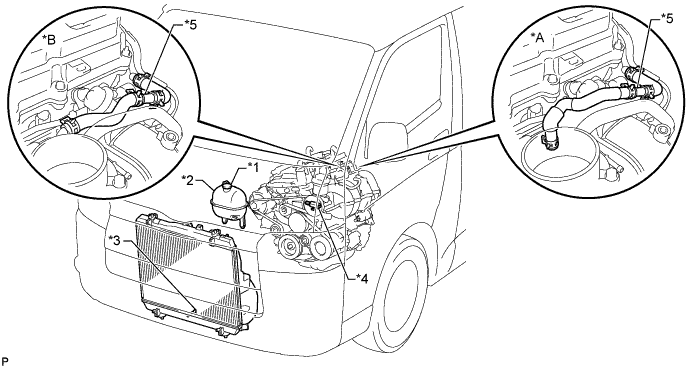
Text in Illustration *A w/ Dual VVT-i *B w/o Dual VVT-i *1 Radiator Reservoir Cap Sub-assembly *2 Radiator Reservoir Assembly *3 Radiator Drain Cock Plug *4 Cylinder Block Water Drain Cock Plug *5 2-Way - - -
Remove the radiator reservoir cap sub-assembly.
-
Loosen the cylinder block water drain cock plug and drain the engine coolant from the engine.
-
-
REMOVE FRONT DOOR SCUFF PLATE RH
-
REMOVE FRONT SEAT ASSEMBLY RH (for Hi-back Seat Type)
Tech Tips
Use the same procedures described for the LH side. Click here
-
REMOVE FRONT SEAT ASSEMBLY RH (for Low-back Seat Type)
Tech Tips
Use the same procedures described for the LH side. Click here
-
REMOVE ENGINE SERVICE HOLE SUB COVER SUB-ASSEMBLY
-
Roll up the carpet, and remove the 5 bolts and engine service hole sub cover.
-
-
REMOVE INTAKE AIR CONNECTOR
-

Slide the clamp and disconnect the No. 2 ventilation hose from the cylinder head cover sub-assembly.
-
Disconnect the vacuum hose from the intake air connector.
-
Loosen the 2 hose clamps.
-
Remove the 2 bolts and intake air connector.
-
-
REMOVE FAN & GENERATOR V BELT
-
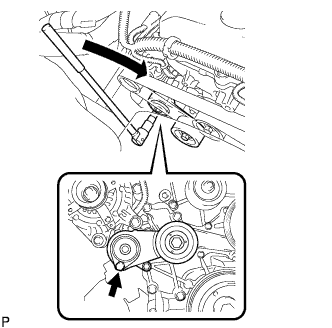
Use the hexagon-shaped part indicated by the arrow in the illustration to move the tensioner pulley downward and decrease the tension in the drive belt. Then remove the drive belt.
Note
When removing the drive belt, do not use the idle pulley's bolt.
Tech Tips
After removing the drive belt, move the tensioner upward to the maximum amount.
-
-
REMOVE FAN PULLEY
-
Remove the 4 nuts, fan pulley and fan spacer.
-
-
REMOVE GENERATOR ASSEMBLY
-
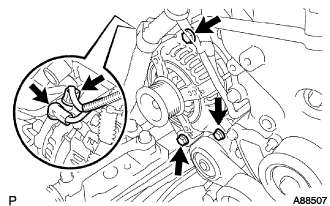
Disconnect the generator connector.
-
Remove the terminal cap.
-
Remove the nut and disconnect the wire harness from terminal B.
-
Remove the 3 bolts and generator assembly.
-
-
REMOVE V-RIBBED BELT TENSIONER ASSEMBLY
-
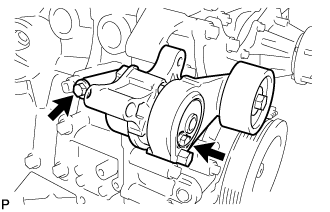
Remove the 2 bolts and belt tensioner.
-
-
DISCONNECT VANE PUMP ASSEMBLY
-

Disconnect the PS fluid pressure switch connector.
-
Remove the 2 bolts and disconnect the pump from the engine.
-
Support the vane pump securely.
-
-
REMOVE WATER PUMP ASSEMBLY
-
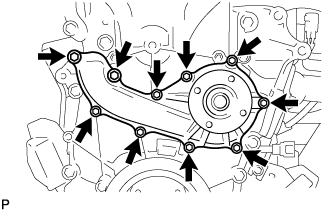
Remove the 10 bolts, water pump assembly and gasket.
-